When planning your camping trip, one of the most important things to consider is how you will keep your food refrigerated. Food safety is something to take very seriously, especially when the food will be stored outdoors in a cooler for multiple days. When you’re relying on a cooler to be your portable refrigerator, space also comes at a premium. This article will show you how to pack a cooler for camping that will keep your food organized and safely cooled.
Selecting A Cooler
If you don’t already have a quality cooler, it’s important to look for one that is highly insulated, has enough space for what you will be keeping in it, and seals well to retain the cold air. Beyond that, you can also choose from other features such as wheels, carrying handles, drains, and the type of latch or closure the cooler has.
There are several styles of coolers available on the market today. The three main categories are soft-sided cooler bags, basic injection-molded hard-sided coolers (think Coleman, Rubbermaid, Igloo), and rotomolded coolers (Yeti, RTIC, Orca, etc.).


For help deciding which cooler is the best fit for your outdoor needs, check out my related article, How To Choose a Cooler For Camping.
Before Packing Your Cooler
Two-Cooler Method
Before packing, decide if you will be taking one or two coolers. I highly recommend taking two separate coolers – one for food and one for drinks. The advantage of the two-cooler method is that the food cooler will stay at a safe, cold temperature for much longer if it is opened as few times as possible.
The drink cooler will likely be opened more frequently, causing warm air to enter and melt the ice faster. But, it won’t affect the safety of your food. Plus, you won’t have to rummage around under the neatly stacked food in your cooler to find a drink!
If having separate coolers for food and drinks is going to strain your budget, I would suggest investing in the best quality food cooler you can afford to make sure your food stays safely chilled. Then, choose a more budget-friendly model for your drinks.
Preparing Your Cooler
Before putting any ice or food into your cooler, you’ll want to give it a good, thorough cleaning. You don’t want to risk contamination of your food with dirt and bacteria.
Next, if you store your cooler in a garage, shed, or attic, you’ll want to bring it indoors to let it cool down as much as possible for about 24 hours prior to placing ice and food in it.
If you want to take it a step further, you can even “pre-chill” your cooler by filling it with cold water and ice. Let it sit indoors with the lid closed for several hours (12-24 hours is best) to really bring down the temperature of the cooler material. Drain the ice water right before you’re ready to pack it for your camping trip. Don’t forget to tightly close the drain plug!
Preparing Your Food
While your cooler is pre-chilling, take a few moments to prepare the food you’ll take camping. Use these tips as guidelines:
- Pre-refrigerate all food that will be packed in the cooler.
- Freeze all meat that you won’t be using the first day of your trip.
- Pre-cut fruits and veggies. Place them in leakproof, sealable containers or ziplock bags. This saves space in your cooler and minimizes prep-time at your campsite.
- Transfer condiments into smaller jars or packages to save space.
- Pre-chill all canned drinks and consider freezing water bottles. Just remember to leave the top 1/4 of the water bottle unfilled. This allows room for ice expansion in the freezer.
How To Pack A Cooler
Now that your cooler is clean, cold, and your food has been prepped, it’s time to pack your cooler for camping.
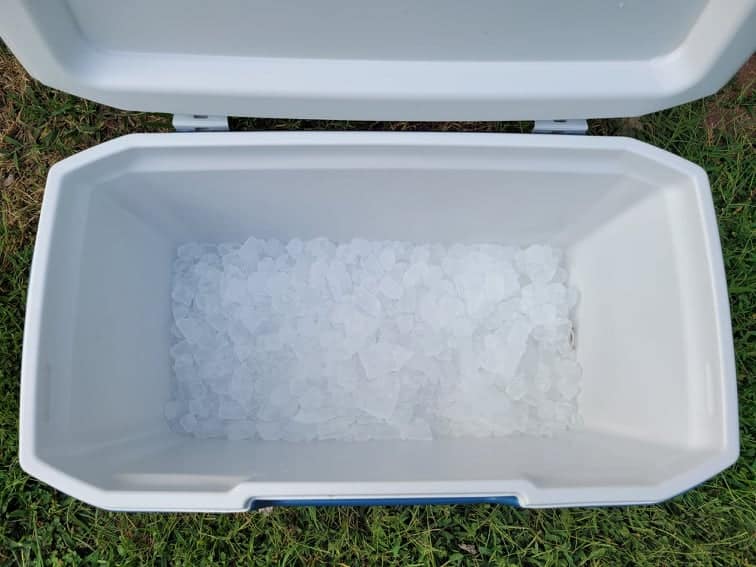
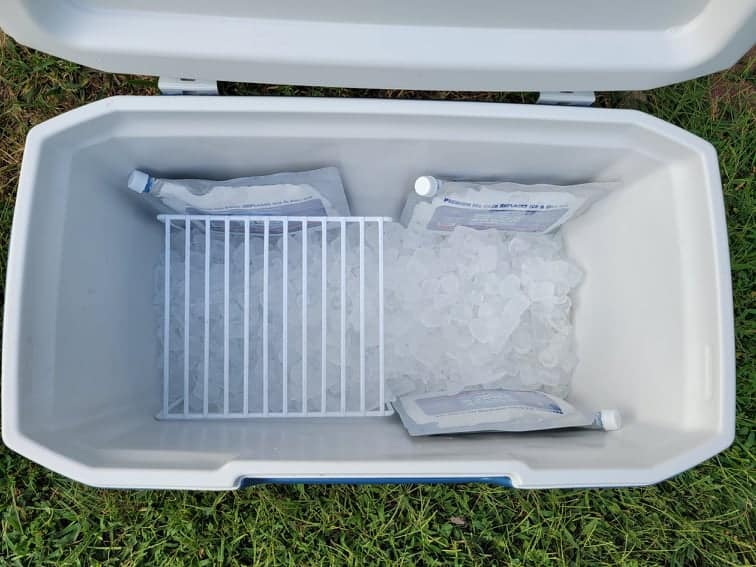
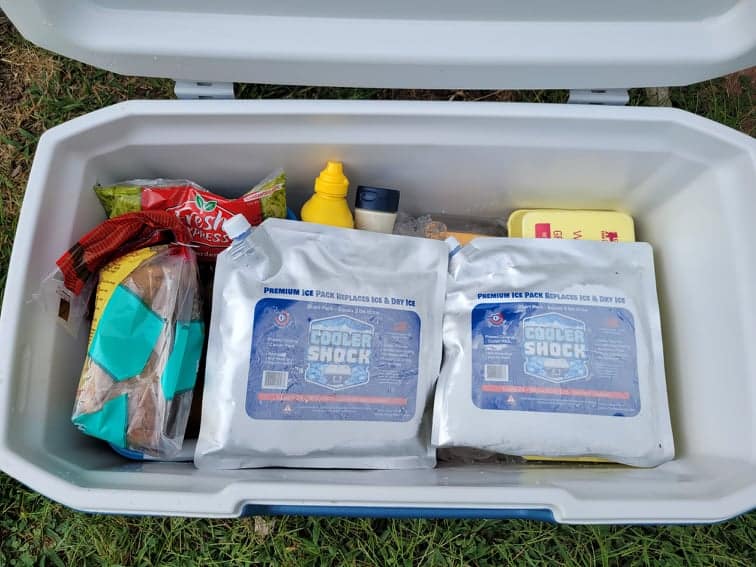
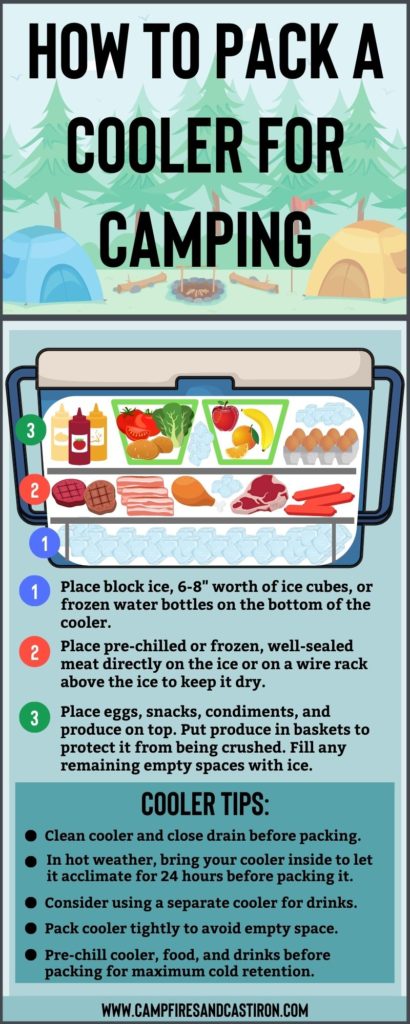
1. Place blocks of ice, 6-8″ worth of large ice cubes, large reusable freezer packs, or frozen water bottles in the bottom of your cooler. Block ice or freezer packs work best, as they take longer to melt. Ice cubes work great for filling in space around food.
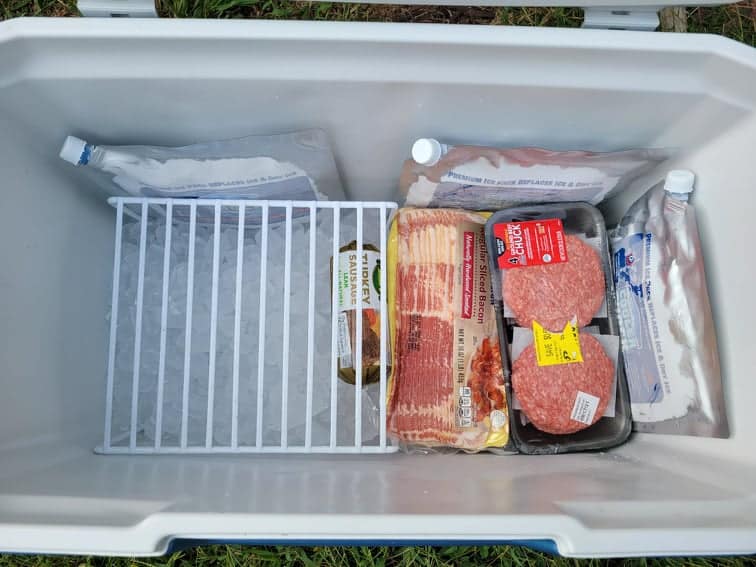
2. Place pre-chilled or frozen, well-sealed meat directly on the ice or on a wire rack above the ice to keep it dry. As you can see in the photo below, I placed the meat in plastic packaging directly on the ice beside the rack. This is the wire kitchen rack I use regularly in my cooler.
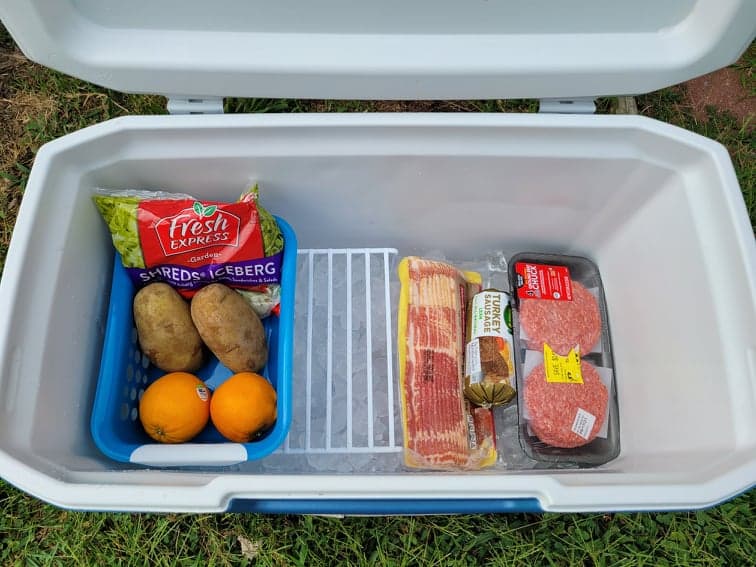
3. Place eggs, produce, condiments, and snacks on top. Put produce in baskets to prevent it from being crushed if it isn’t already in a sealed container. You can also pre-crack eggs into an empty bottle or ziplock bag to save space.
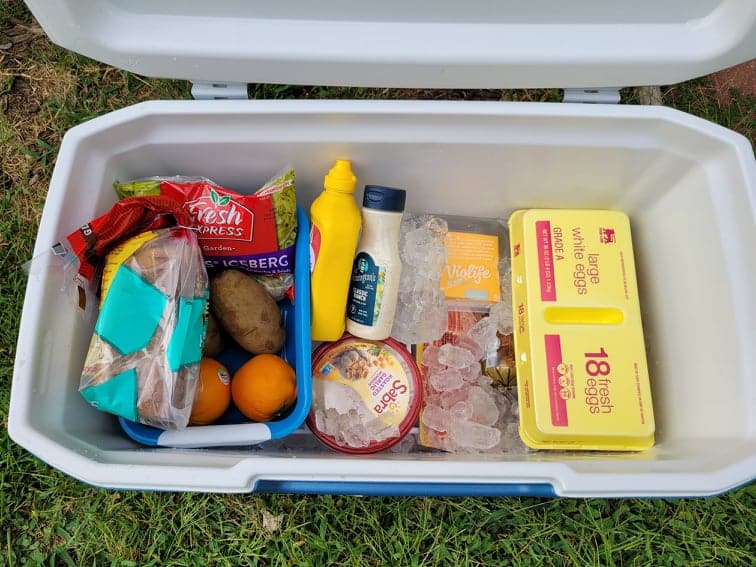
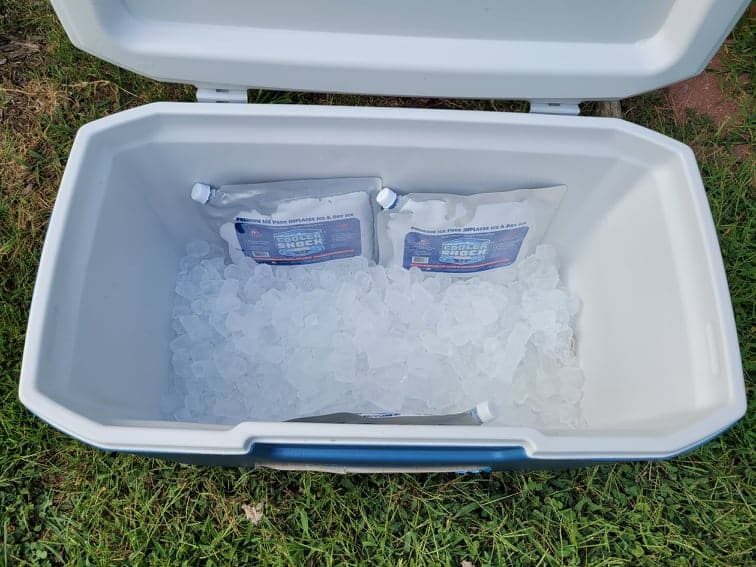
4. Lastly, fill in any empty spaces with more ice. The more tightly you can pack a cooler, the colder it will stay. I like to place large, reusable ice packs on top to keep things cold while avoiding soggy food caused by melting ice. For extra insulating power, cut a thin piece of foam to fit over the top of the cooler contents before closing the lid.
Make Your Cooler More Effective
Now that your cooler is packed and ready to go, consider these tips to maximize its effectiveness:
- Don’t drain the melted ice water from your drink cooler. The melted ice water is still much colder than the air introduced in its place after draining it. It is okay to drain some water from your food cooler if needed to prevent food from getting soggy.
- Use wire racks and shallow baskets to keep food elevated above the water. Store loose produce in baskets.
- Pack your cooler tightly with food and ice for maximum cooling power. Avoid empty space, which can raise the temperature in the cooler.
- Make sure meat is all tightly sealed to prevent leaks.
- Use a refrigerator thermometer to make sure your cooler temperature stays at 40 degrees or below for food safety.
If you have any cooler-packing questions or comments, leave a reply in the comment box below. Happy camping!
How To Pack A Cooler Infographic
This post may contain affiliate links. This means if you click on a link and make a purchase, I will receive a small commission, at no cost to you, that makes it possible for me to keep the Campfires and Cast Iron site up and running. Please see our disclosure policy for details.