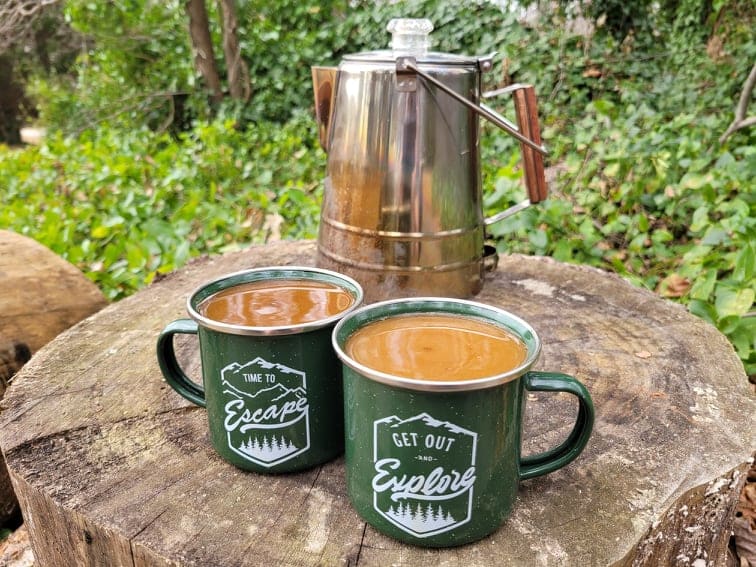
For many of us, coffee is an essential way to start the day. We use fancy automatic coffee brewing systems that have our morning mug of up and at ’em ready in a flash. I won’t lie, I love the convenience of my coffee pod system on busy weekday mornings. I also love drinking coffee when camping, but I obviously don’t take my Keurig with me.
My favorite way to make a cup of coffee without electricity is by using a camping coffee percolator. Yes, it’s a little slower than an automatic brewer, but in my opinion, nothing beats the taste of fresh coffee that’s been percolating over a campfire. And let’s not forget about the enticing aroma of freshly brewed coffee wafting among the mouth-watering smells of a bacon and egg breakfast. MmmHmm!
Now, let’s get down to business and learn how to use a percolator to make the perfect cup of camp coffee.
How To Use A Camping Coffee Percolator in 8 Steps:
- Start your campfire.
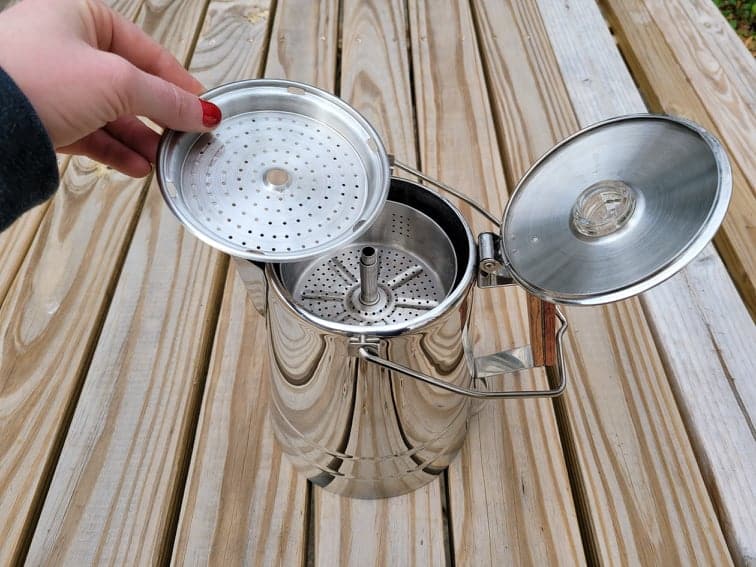
- Remove basket cover, brew basket, and stem from pot.
- Fill percolator pot with water.
- Add ground coffee to brew basket.
- Replace stem and brew basket in percolator pot.
- Place cover on brew basket and close percolator lid.
- Heat to boiling and let percolate 5-8 minutes.
- Remove percolator from heat and enjoy your coffee!
Keep reading for detailed, step-by-step photo instructions to walk you through successfully making the perfect cup of percolator camping coffee every time. We’ll also take a look at how percolators work, what kind of coffee to use in a percolator, and how to choose the best camping coffee percolator for your needs.
How Does A Coffee Percolator Work
A coffee percolator is actually a pretty simple piece of equipment. As the water in the pot boils, air bubbles force the water up a hollow, straw-like metal stem in the center of the pot. When the hot water comes out of the top of the stem, it rains back down and enters the brew basket that holds the coffee grounds. After the water seeps through the coffee grounds, it drips through tiny holes in the brew basket back into the pot below. This process is known as “percolating,” or “perking,” and it continues for several minutes until the desired coffee strength is achieved. For more on how percolators work, check out this post from PageOneCoffee.
How To Choose The Best Camping Coffee Percolator
When choosing a camping coffee percolator, you’ll want to consider these factors before making a purchase:
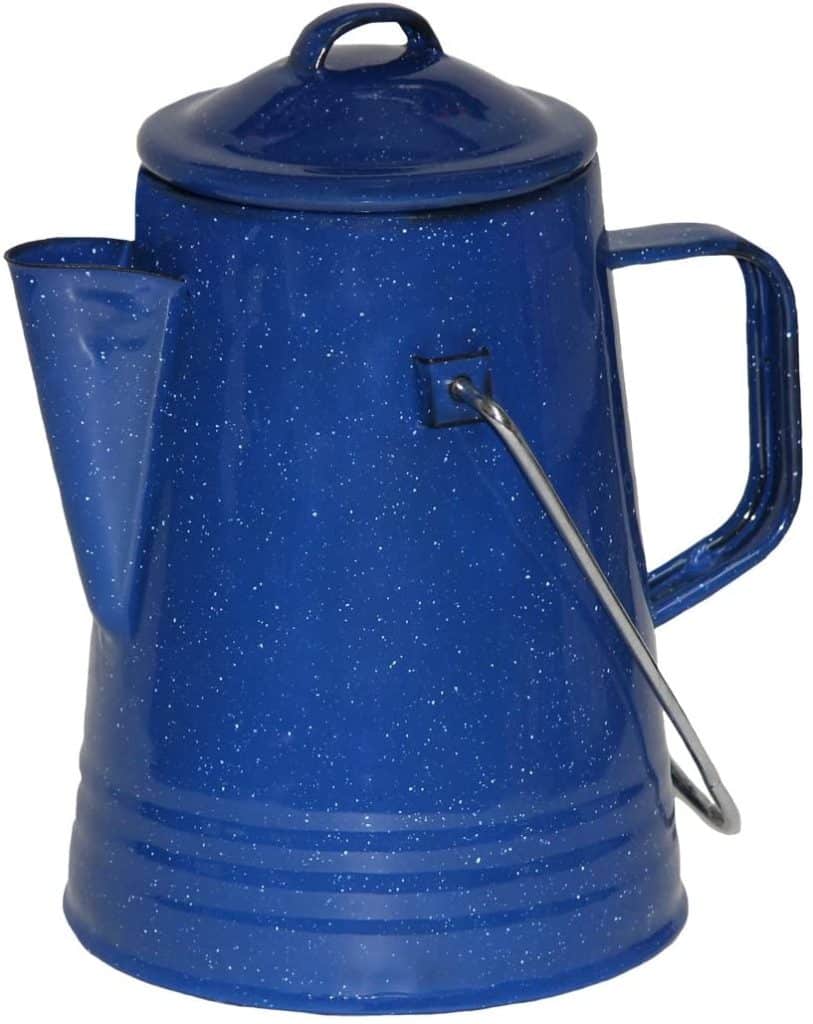
- What material is the percolator made of? Ideally, you’ll want to use a percolator constructed of high quality, food-grade stainless steel. This material is durable, rust-resistant, and won’t leech aluminum into your coffee. Enamel-coated percolators can also be a good choice, but note that the enamel is often prone to chipping if the pot is bumped, scratched, or dropped.

- What material is the handle made of? It’s also a good idea to take the handle material into consideration. Some camping percolator pots have metal handles, while others may be insulated with wood or silicone. Insulated handles are easier to grip and stay cooler when handling the percolator pot, but it’s always still wise to use a hot mitt or heat-resistant gloves when handing a hot pot of coffee. You’ll also want to make sure you keep insulated handles out of the direct heat of a fire or camp stove to avoid melting them.
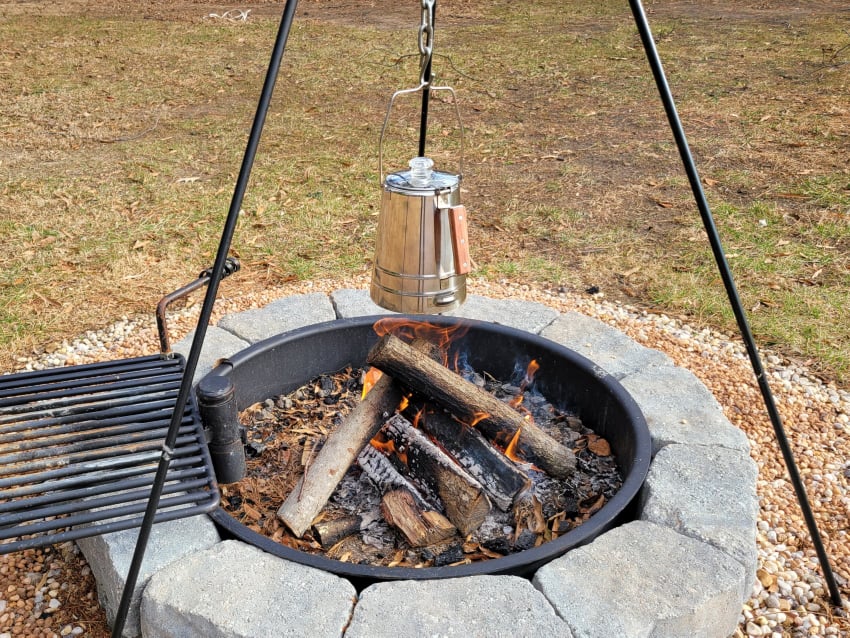
- Is there a bail handle for hanging over a fire? If you plan to hang your percolator over the fire, make sure it has a metal hanging handle or bail wire on top of the pot.
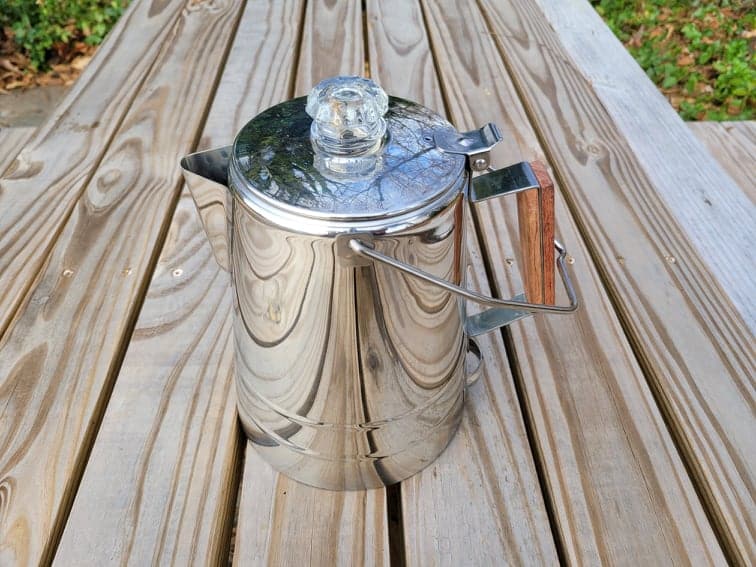
- Does it have a percolator knob? While not an absolute dealbreaker, I always prefer percolators with a clear knob on top. The knob allows you to see when the water is actively percolating and view the coffee’s color, which can help you decide when it has reached ideal strength. Percolator knobs are usually made of glass, resin, or plastic. While each material has it’s pros and cons, my personal preference is glass. However, many resin and plastic knobs are quite durable, heat-resistant, and are less prone to cracking when traveling with your percolator.
- How many cups of coffee will it hold? While this question may seem straightforward, it turns out there’s more to calculating how many cups of coffee a percolator or coffee maker will hold. See the next section below for more information on correctly calculating coffee pot capacity and how to choose the best one for your needs.
How Cups Of Coffee Are Calculated
Although I’ve been drinking coffee for years, I never realized a “cup” of coffee is not necessarily equivalent to the standard U.S. volumetric cup measurement of 8 ounces. In fact, one “cup” of coffee, according to coffee pot manufacturers, could be equivalent to 4, 5, or 6 ounces of liquid.
These measurements date back to a time when smaller-sized teacups were used for drinking coffee and only held 4 or 5 ounces. For comparison, today’s average-sized coffee cups hold about 8 ounces, and larger mugs or insulated tumblers can hold anywhere from 12 to 24 or more ounces.
Choosing The Right Size Camping Coffee Percolator
Camping coffee percolators come in a variety of sizes, from the small 3-cup size that’s perfect for one person to a large, 36-cup size that will serve a big crowd. So how do you decide which size is best? First, determine how many people you’ll be preparing coffee for. Next, estimate how many servings each person will want. Then, use the following guidelines to help you choose the best percolator size for your needs.
When selecting a coffee percolator, it’s important to look at the total volumetric capacity as measured in ounces, not cups. For example, if a percolator says it makes “12 cups of coffee,” does that mean 12 4-ounce cups of coffee or 12 8-ounce cups? Based on those calculations, the actual number of ounces could range anywhere from 48 to 96. That’s a pretty big difference!
Although the percolator may advertise making 12 cups of coffee, always double-check the capacity in ounces, then divide that number by 8 to get a more accurate estimate of the number of 8-oz cups the pot will actually make. If that sounds confusing, take a look at the following example:
A percolator pot says it will make “12 cups of coffee.” You read the description, which goes on to state the capacity is “72 ounces.” To do the math, divide 72 oz by 8 oz (the standard U.S. coffee cup size) and you’ll see that the percolator will make 9 8-oz cups of coffee instead of 12.
Hopefully, that clears up some confusion about coffee pot measurements. Below, I’ve listed my preferred camping percolators based on serving sizes and features.
Best Camping Percolator for 1-2 People:

- 3-cup (15 oz) Capacity (Makes 2 7.5-oz cups)
- Stainless Steel
- Heat-Resistant Silicone-Coated Handle
- Clear Resin Knob
- No Hanging Handle – Best for use on a fire pit grate or camp / backpacking stove
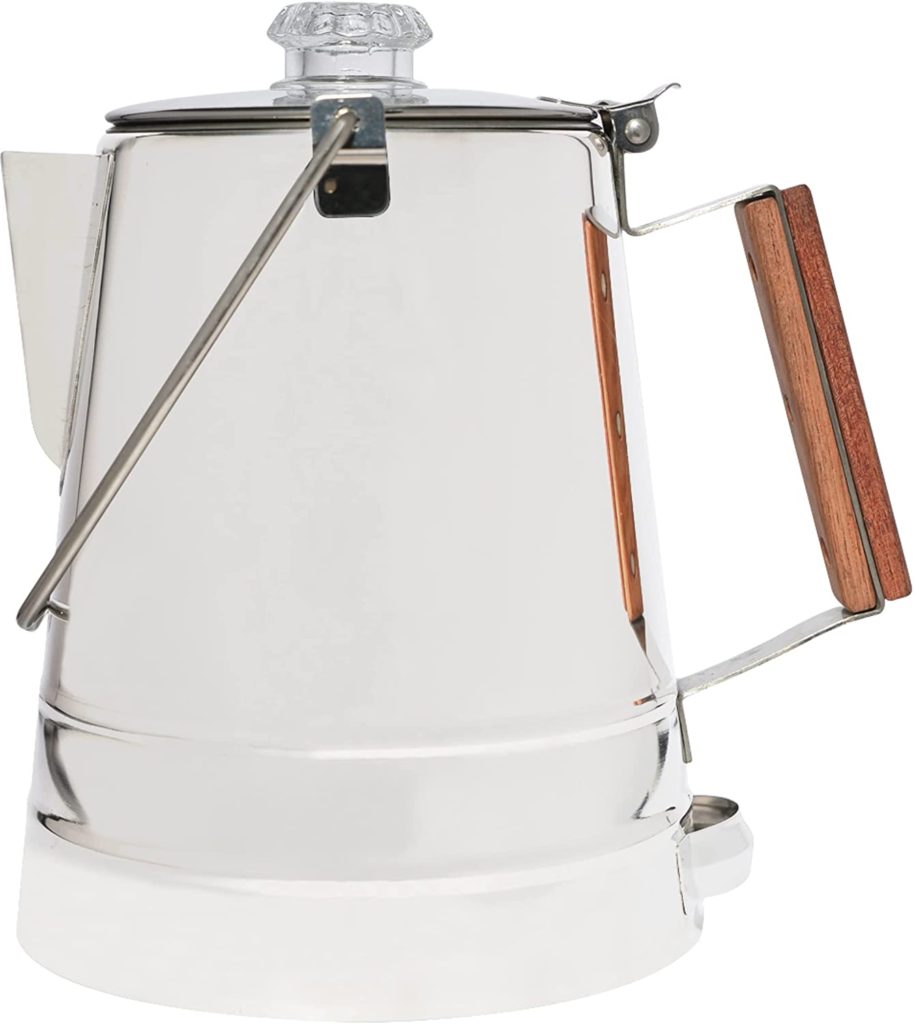
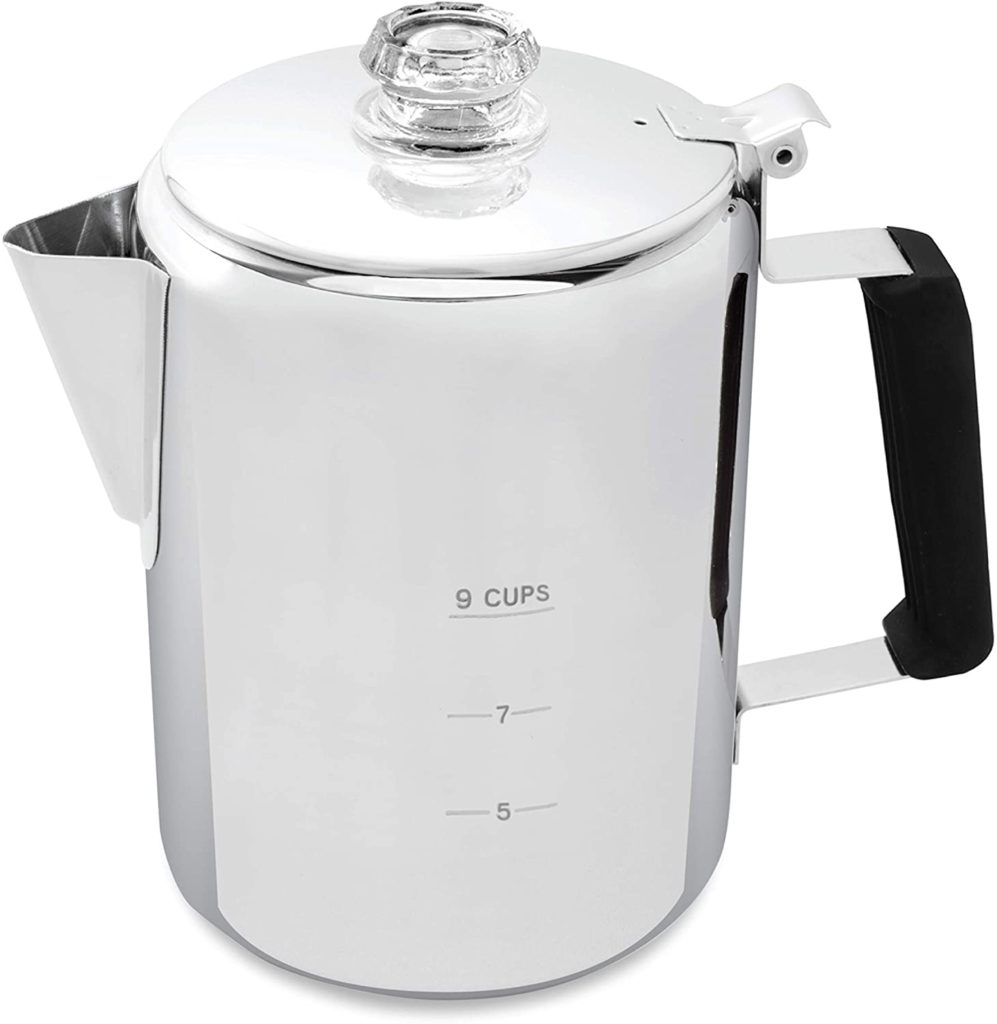
Best Camping Percolator for 3-4 People:

- 8-cup (40 oz) Capacity (Makes 5 8-oz cups)
- Stainless Steel
- Stainless Steel Handle
- Hanging Handle
- Clear Glass Knob
- Ok For Use In Fire Pit, Hanging Over Fire, Camp Stove
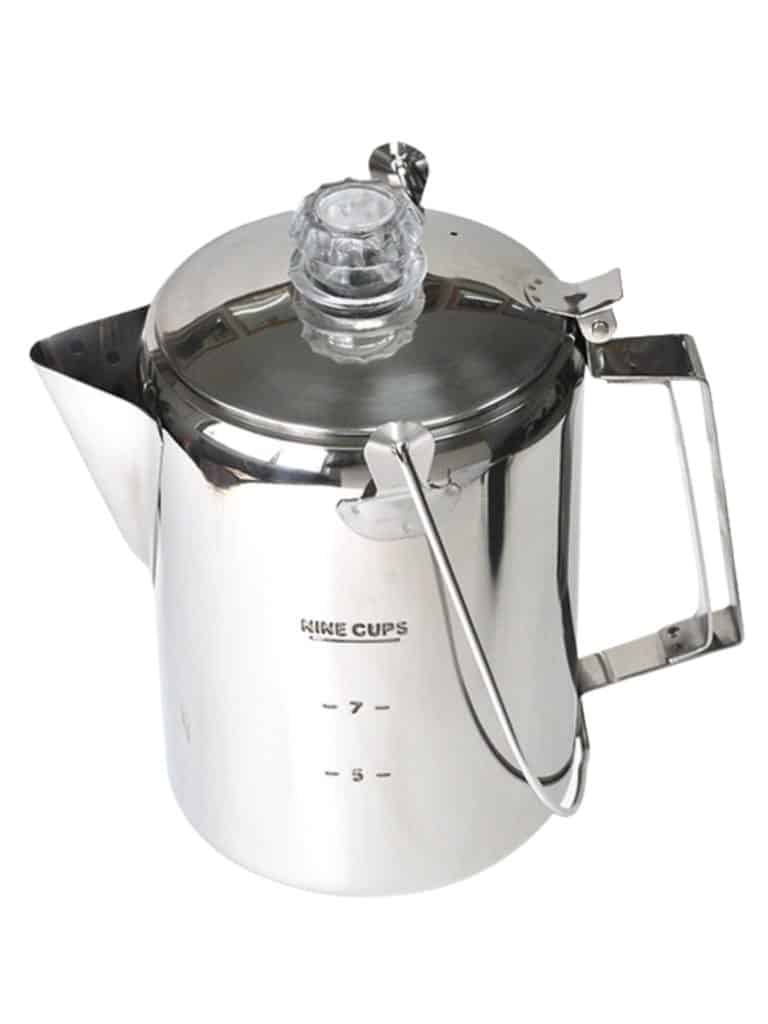
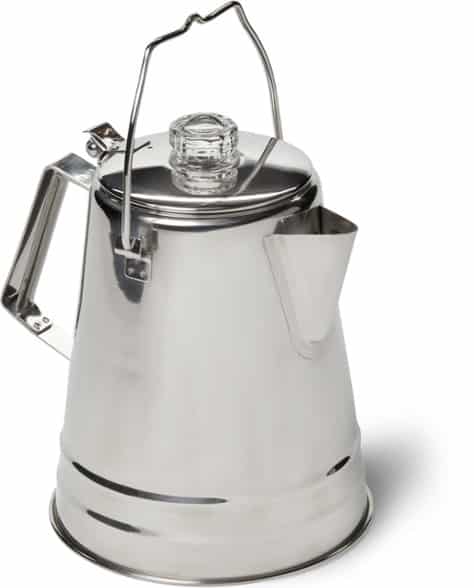
Best Camping Percolator for 6 People:
- 14-cup (70 oz) Capacity (Makes 8.75 8-oz cups)
- Stainless Steel
- Stainless Steel Handle
- Hanging Handle
- Clear Glass Knob
- Ok For Use In Fire Pit, Hanging Over Fire, Camp Stove
What Kind Of Coffee To Use In A Percolator
When brewing coffee in a percolator, you can use any type of ground coffee. However, course-ground is recommended, particularly if you’re not using a filter in the metal brew basket. The course grind keeps the coffee grounds from falling through the holes in the brew basket and ending up in your mug. Since course-ground coffee can sometimes be difficult to find in stores, many people choose to grind their own from fresh beans. It’s much easier to control the size of the grounds this way.
How Much Ground Coffee To Use In A Percolator
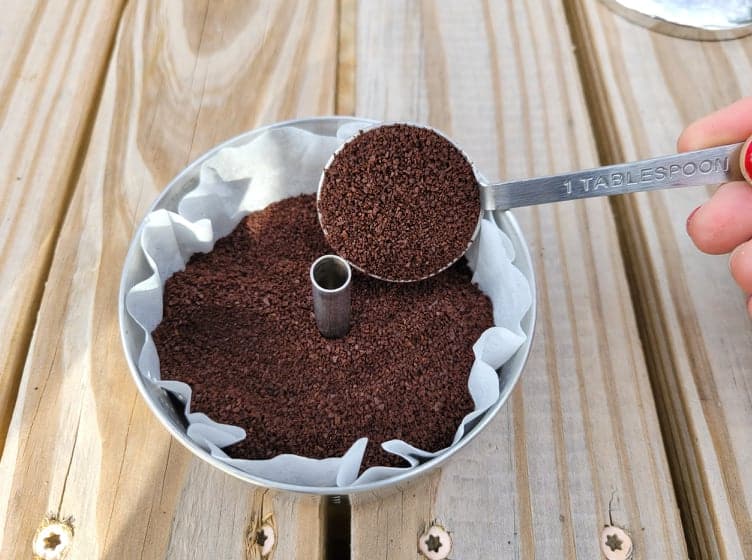
The recommended ratio of coffee to water is 1-2 Tablespoons of ground coffee per 6 ounces of water, depending on your preferred coffee strength. Because it’s difficult to be sure exactly how much brewed coffee you’ll actually end up with according to coffee pot “cup” measurements, always calculate the number of tablespoons of ground coffee to use based on the percolator’s capacity in ounces. The table below is helpful for determining the right coffee to water ratio. For a weaker brew, use the 1 TBSP of coffee per 6 ounces of water recommendation. For a strong, bold brew, use 2 TBSP coffee per 6 ounces of water. If you prefer your coffee at medium strength, split the difference between the 1 and 2 TBSP recommendations.
Table: Tablespoons Of Coffee Per Ounces Of Water
| Coffee Percolator Capacity (ounces) | Number of 8-oz Cups Made | Tablespoons Ground Coffee (1-2 TBSP per 6 oz water) |
| 15 oz | 1.8 | 2.5 to 5 TBSP |
| 40 oz | 5 | 6.5 to 13 TBSP |
| 70 oz | 8.75 | 11.5 to 23 TBSP |
| 140 oz | 17.5 | 23 to 46 TBSP |
Should You Use A Filter In A Percolator?
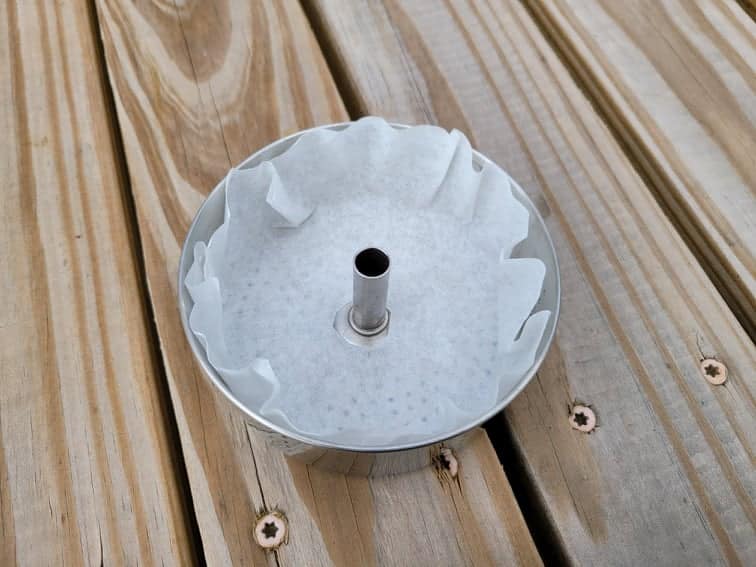
Unlike traditional drip-brew electric coffee pots, you don’t necessarily need to use a filter in a percolator. The metal brew basket is designed with several very small holes that let water drip through while keeping the coffee grounds inside the basket. But, this is why the size of the ground coffee is important. If the ground coffee is too fine, grounds will leak through the holes of the basket and into the coffee below.
Nobody likes a mouthful of coffee grounds while enjoying a morning cup of joe, so here’s where the filter comes into play. By using a round-shaped filter designed for use in percolators, you can keep the grounds out of your coffee. Filters also reduce the amount of natural coffee oils that end up in your cup.
Percolator disc-shaped coffee filters can be purchased here, or you can trim a standard coffee filter to fit the brew basket. To use a standard coffee filter, fold it in half three times, then trim one-fourth inch off of the pointy end and about a half-inch across the top. It should fit your percolator basket as pictured below.

How To Make Coffee On A Campfire
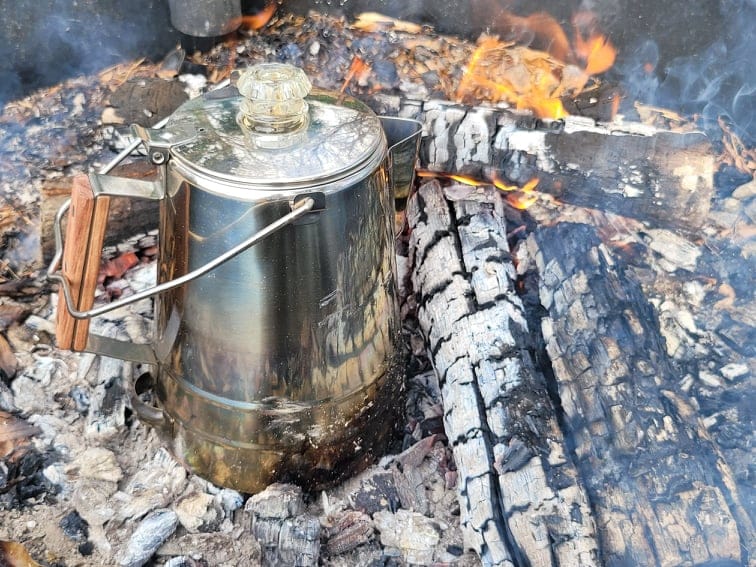
There are multiple ways to make coffee using an open fire. The percolator pot can be placed on a fire pit grate right above the fire, it can be hung from a tripod over the fire, or it can be placed directly on hot campfire embers. Now, we’ll walk step-by-step through each coffee-making method.
Step 1: Start Your Campfire
Light your campfire and let it burn down slightly. If you’re using a hanging tripod, you’ll want the flames to be higher so the percolator pot gets hot enough to boil the water. If you’re using a campfire grate or placing the percolator pot in the embers, a smaller-flame fire where the logs have become charred and the embers are red-hot is ideal to avoid scorching the coffee or melting the insulated handle.
Pro Tip: When using a percolator pot with a wooden handle, I always soak the handle in water or wrap a wet rag around it for a few minutes to saturate the wood prior to putting the pot in or over the campfire. This helps prevent accidentally burning the handle.

Step 2: Remove Basket Cover, Brew Basket, And Stem From Pot
Open the percolator pot and remove the basket cover, brew basket, and stem from the pot, and set them aside.

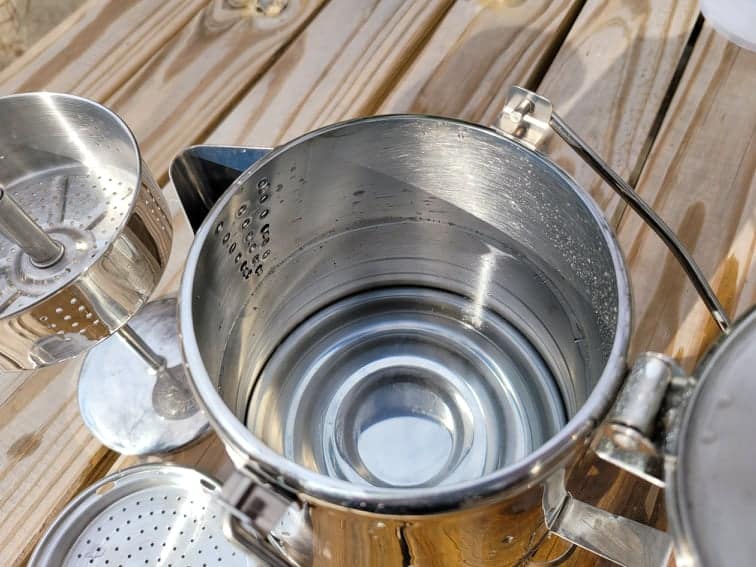
Step 3: Fill Percolator Pot With Water
Fill the percolator with water, but stop just below the bottom of the pour spout. Filling above the bottom of the spout can cause the percolator to boil over. Make sure you know how many ounces of water you’re filling the pot with in order to use the right amount of ground coffee.
Step 4: Add Ground Coffee To Brew Basket
Insert a coffee filter, if desired, and fill the brew basket with the correct amount of ground coffee.
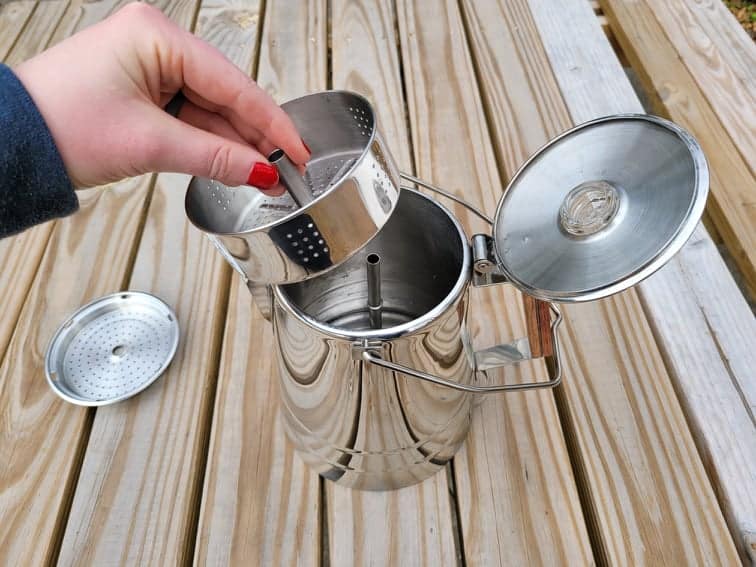
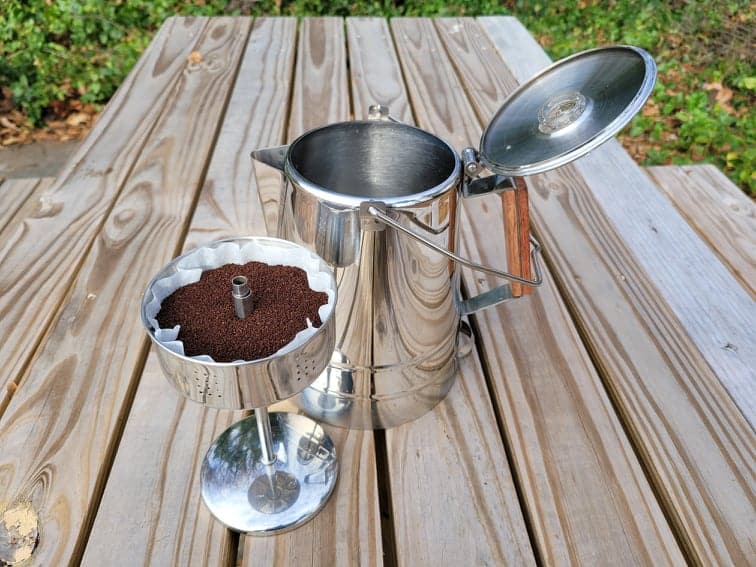
Step 5: Replace Stem And Brew Basket In Percolator Pot
Place the brew basket back on the stem, then place the whole assembly back into the percolator pot.
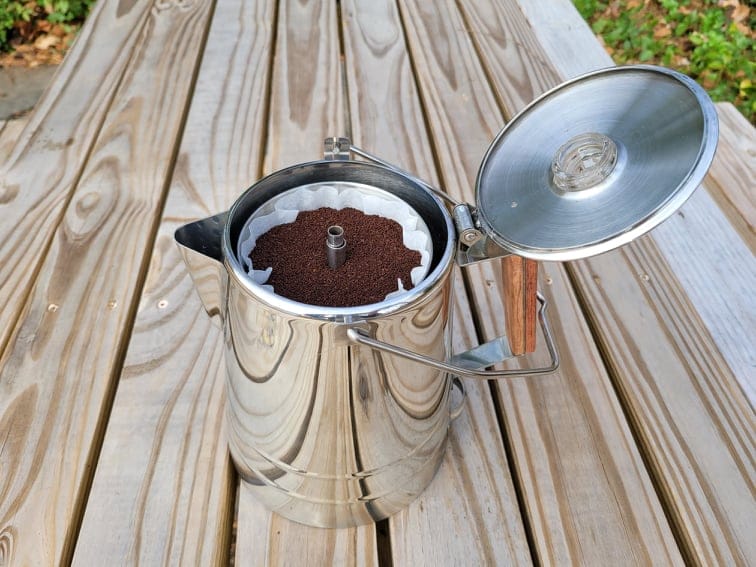
Step 6: Place Cover On Brew Basket And Close Percolator Lid

Step 7: Heat To Boiling And Let Coffee Percolate
Heat the water in the percolator until it boils. This may take several minutes, especially for larger percolators. Once the water is boiling, you should start to see it percolating, or intermittently shooting up from the metal stem into the glass knob. Let the coffee percolate for about 5 to 8 minutes, depending on your preferred coffee strength. The video below is a good example of what percolating should look like.
While you want your percolator pot to maintain a steady boil, it’s actually possible to overheat it. If you notice the percolating process is happening too vigorously or the glass viewing knob is constantly filled with liquid, move the pot further away from the heat source. You don’t want to end up with scorched, bitter coffee!
Step 8: Remove Percolator From Heat
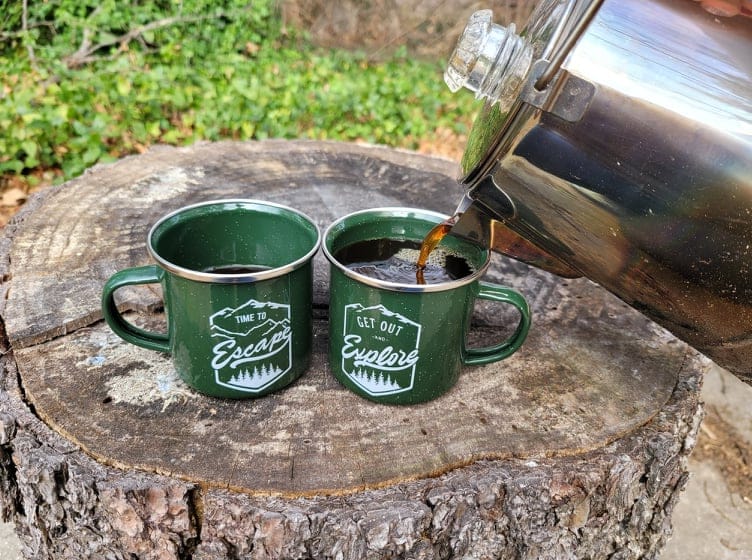
When the coffee has reached your desired strength and color, remove the percolator from the heat using heat-resistant gloves. Let the pot cool for a few minutes, then carefully pour it into mugs. You may have to hold the lid down to prevent it from flipping open when pouring coffee.
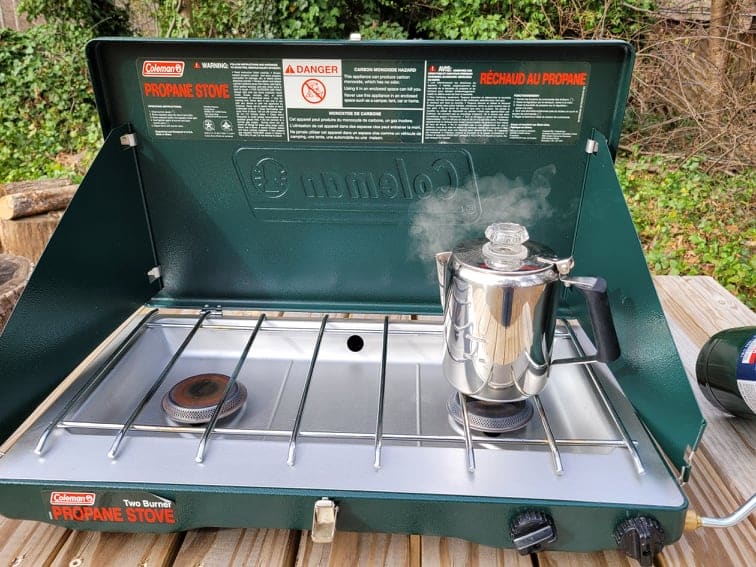
How To Make Coffee On A Camp Stove
Using a coffee percolator on a camp stove is easy and often faster than over an open fire. Simply prepare the percolator by following the same steps listed above. Then, light your camp stove and bring the water to a boil. Once the pot starts percolating, I typically turn down the heat just a bit to maintain a steady perk but avoid overheating the coffee. Let the coffee perk for 5 to 8 minutes, then turn off the stove and let the pot cool for a few minutes prior to serving.
How To Clean Your Camping Coffee Percolator
Once the percolator is cool to the touch, pour out any remaining coffee and appropriately discard the grounds and filter. Remove the cover, basket, and stem from the inside of the pot. Thoroughly rinse the percolator pot and each of the components. While a good rinse is usually sufficient, make sure to periodically wash all parts of the percolator with mild soap and water to remove any scale and coffee residue build-up.
For tougher residue or stains, such as soot build-up after use in a campfire, use a nylon scrub brush or non-scratch sponge to clean the percolator. Avoid using steel wool or metal scrub brushes, as these will scratch and damage the stainless steel. After washing, dry the percolator and its components well with a soft cloth to avoid water spots.
Summary
And that’s it! Hopefully, you have a better understanding of how a percolator works and how to make a great cup of coffee using a camping percolator. As always, feel free to leave any questions or comments below, and happy camping!
Want more camp cooking inspiration? Be sure to check out the Recipes section of the blog for more delicious and easy camping recipes!
Recommended Items


This post may contain affiliate links. This means if you click on a link and make a purchase, I will receive a small commission, at no cost to you, that makes it possible for me to keep the Campfires and Cast Iron site up and running. Please see our disclosure policy for details.