Last updated on December 6th, 2022
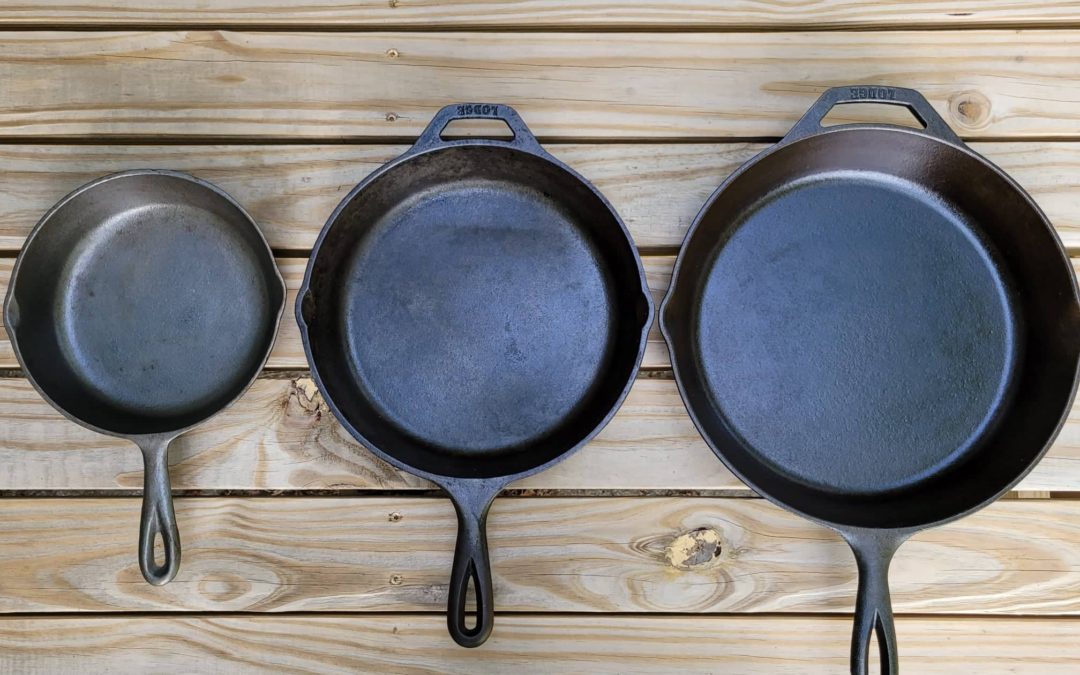
A well-seasoned cast iron skillet is a valuable addition to any kitchen or campsite. The smooth, easy-release finish created by properly seasoning cast iron cookware rivals that of Teflon-coated pans, minus the chemicals. Many people don’t use cast iron because they think it’s difficult to clean and maintain. The truth is, cast iron cookware is actually pretty easy to use and care for. It’s also incredibly versatile and durable, making it perfect for campfire cooking or everyday use at home. So don’t be intimidated by the cleaning and seasoning process. I’ll show you just how easy it really is!
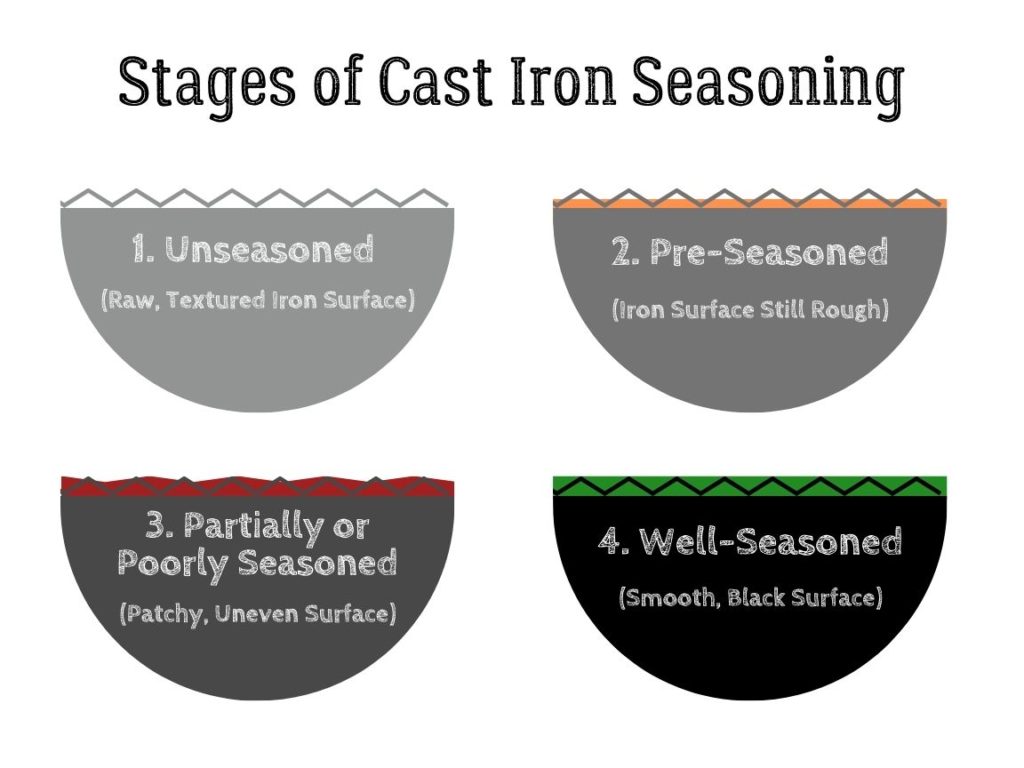
What Is Cast Iron Seasoning? Why Is It So Important?
Seasoning. It’s one of the most commonly used words when discussing cast iron care and maintenance. Without proper seasoning, everything you try to cook will stick to the pan like superglue, and your cast iron cookware will be prone to rust. But, what exactly is seasoning, and why is it so important?
Cast iron seasoning is essentially multiple thin layers of oil baked onto the surface of the pan. This is done at a high temperature, which causes the liquid oil to bond with the iron on a molecular level and transform into a slick, hard surface through a process called polymerization. This creates the smooth, easy-release finish you want on a cast iron pan.
Cast iron is a very porous material. This means it has microscopic holes, or “pores,” which occur as a result of the iron-casting process. When cooking on unseasoned cast iron, tiny food particles settle down into the pores, essentially bonding with the iron and causing the food to stick, making for a very frustrating cooking and cleaning experience. Without a protective seasoning layer, cast iron pans also rust very quickly, as iron oxidizes when exposed to moisture and oxygen.
Do I Need To Season A New Cast Iron Pan?
Many new cast iron pans come with a thin layer of seasoning straight from the factory and are labeled as “pre-seasoned.” While this may be fine for cooking certain foods, you’ll likely need to use more cooking oil at first to prevent sticking. Also, stay away from low fat, high protein, and acidic foods such as chicken breasts, eggs, or spaghetti sauce until a stronger seasoning layer can be built up.
While it’s true that cast iron cookware gets better with use, I always suggest adding an additional layer or two of seasoning on new, pre-seasoned cast iron before its first use to prevent food from sticking and make cleaning easier. This will be especially true if the pan has a rough, textured cooking surface. If your new pan has a smooth, machined surface and comes pre-seasoned from the factory, you probably won’t need to season it again before its first use. However, regularly seasoning both types of pans will help create the best cooking surface possible.
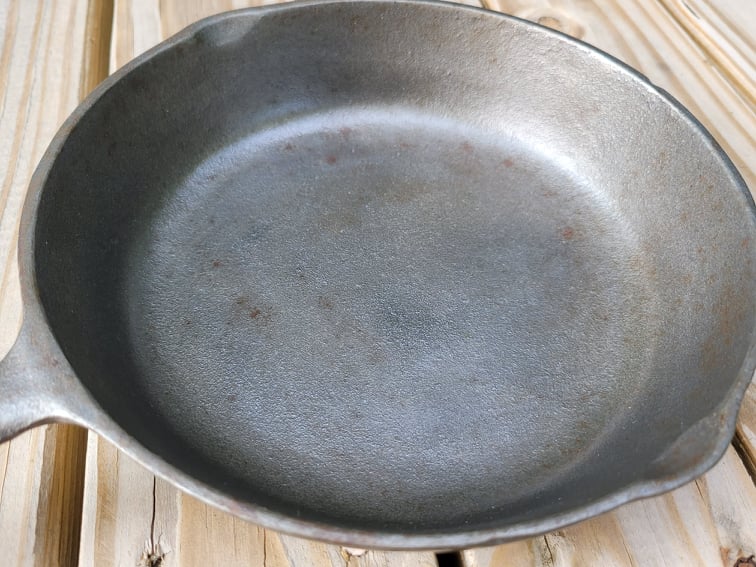
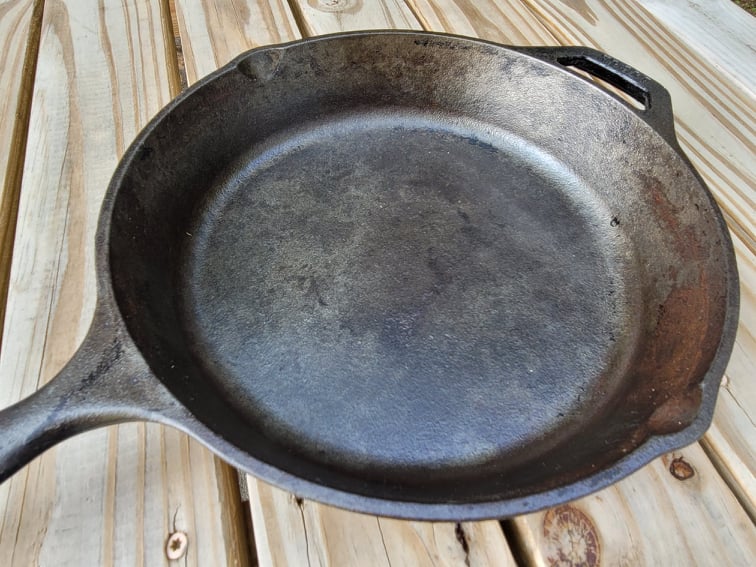
Why Is My New Cast Iron Pan Rough?
If you’ve ever compared an old, heirloom cast iron skillet and a brand new one right out of the box, you’ll probably notice one has a very smooth cooking surface and one is quite rough and textured. In the past, the cooking surface of a cast iron skillet was polished to a smooth finish before leaving the factory. Additionally, the old skillet probably has a strong, even layer of seasoning built up from years of use.
Many of today’s new skillets are intentionally left with a rough-textured cooking surface after the iron-casting process. According to this article from The Lodge Cast Iron Company, “This texture provides more surface area for the seasoning to bond and adhere to the iron. As the layers build up, the oils and fats will fill in the texture, creating a smooth, naturally non-stick cooking surface that will last for generations.”
Which Oil Is Best For Seasoning Cast Iron Cookware?
If you’ve ever done a Google search for “Best oil for seasoning cast iron pans,” you’ll quickly realize there are at least 10 different answers with all sorts of reasons behind them. You’ll also see how divided cast iron enthusiasts can be over why one oil or fat is better than another.
On one hand, you’ve got a group of people who swear by using lard, butter, or rendered fat to season cast iron because that’s what their parents and grandparents always used. On the other hand, you’ve got those who say refined oils such as flaxseed, grapeseed, or canola are best. I’ve even seen the recommendation to “Just throw some bacon in there – the grease will season the pan as you cook.” With so many different suggestions out there, how do you know which one you should actually use, or does it really matter?
Generations ago, before refined cooking oils were widely available, people used what they had on hand to season cast iron pans. Hence, the traditional use of lard, bacon grease, and butter. Will these things still work today? Yes, but not as effectively as more refined oils with a lower percentage of saturated fat. Let’s look at why.
Saturated vs. Unsaturated Fats
The two most important factors in determining which oil to use for seasoning are 1: The type of fat it contains (saturated vs unsaturated), and 2: The smoke point of the oil.
All fats and oils are molecularly made up of a percentage of both saturated and unsaturated fats, but there are a few key differences between the two.
- Saturated fats: Butter, lard, animal fat, and bacon grease all contain higher amounts of saturated fats and they are solid at room temperature. They don’t work as well for creating a strong, even seasoning layer because saturated fat molecues don’t bond well with other molecules (i.e. cast iron). This can result in patchy, flaky, uneven seasoning and food may be more likely to stick to the pan when cooking, particularly if the cast iron has a rough, textured cooking surface.
- Unsaturated fats: Unsaturated fats are liquid at room temperature and include most cooking oils. They easily bond with other molecues, which creates a stronger, more uniform seasoning layer on the cast iron that is easier to cook with and clean. A solid seasoning layer created with unsaturated fat is also more receptive to additional layers of seasoning.
Oil Smoke Point
Every oil has a smoke point, which is the high temperature at which the oil begins to break down and smoke is produced. While you don’t want your oil to smoke when cooking, this is a good thing when seasoning a cast iron pan.
In order to make the polymerization process occur to create a strong, slick seasoning layer, an unsaturated oil must be heated beyond its smoke point. This causes the molecules of the oil to break down and bind to the molecules of the cast iron, forming a nearly unbreakable chemical bond.
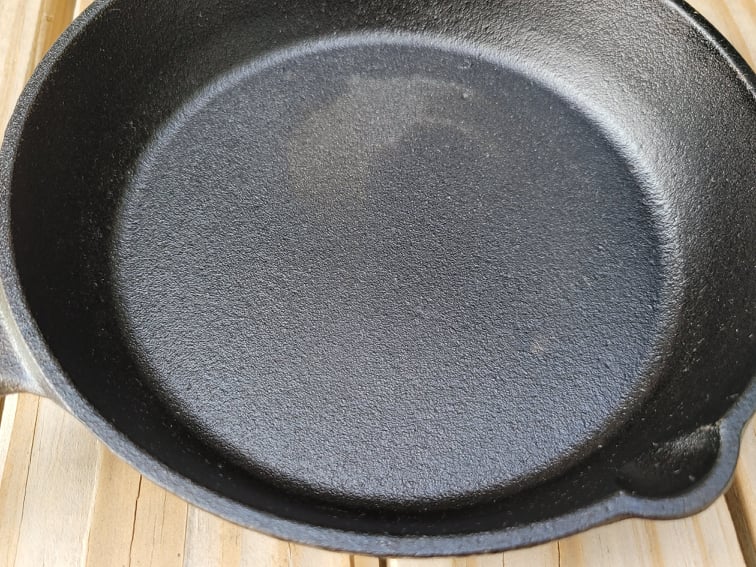
If the oil is not heated beyond its smoke point, it will not completely break down and bond with the iron. This will leave behind a brown, sticky layer of oil that is prone to turning rancid instead of a nice shiny, black, easy-release finish.
Top 3 Seasoning Oils
In summary, for seasoning cast iron, you want to use an oil that is low in saturated fat and high in unsaturated fat. You’ll also want to know the smoke point of the oil you’re using and make sure your oven is capable of reaching and sustaining a temperature that is approximately 25 to 50 degrees above that smoke point for an hour.
With these things in mind, the top three oils for achieving the best seasoning are:
- BuzzyWaxx – I have been using BuzzyWaxx over the past year, and it has quickly become my favorite way to season my cast iron. BuzzyWaxx is a blend of seasoning oil and beeswax. It comes in either a wax disc or a metal tin, and it’s super easy to work with. The wax is very easy to apply and buff into the cast iron and yields fantastic, even seasoning results.
- Grapeseed Oil – The fat profile of Grapeseed oil makes it another excellent choice for building a strong, uniform seasoning layer. I use this brand with good results.
- Canola Oil – While Canola oil appears to be an obvious choice based on its fat profile, it’s important to note that most cheap Canola contains impurities that can cause stickiness or streaking on cast iron. Make sure to use a high-quality oil, or opt for the Lodge Seasoning Spray, which is 100% Canola oil without additives or propellants.
Runner up: Flaxseed Oil – A low percentage of saturated fat, a very low smoke point, and a low required oven temperature make Flaxseed oil a good choice for creating a very strong and durable seasoning layer. It is a little more pricy than other oils, but a little bit goes a long way. This is my favorite brand.
Seasoning Oil Comparison Chart
This reference chart takes the guesswork out of choosing an oil, knowing the smoke point, and setting your oven to the correct temperature.
| Oil Type | % Unsaturated Fat | % Saturated Fat | Smoke Point | Recommended Oven Temp |
|---|---|---|---|---|
| Flaxseed | 86% | 9% | 225 F | 275 F |
| Grapeseed | 88% | 12% | 420 F | 450 F |
| Canola | 92% | 7% | 400 F | 450 F |
| Avocado* | 88% | 12% | 520 F | 500 F |
| Soybean / Vegetable | 85% | 15% | 450 F | 475 F |
| Sunflower | 85% | 15% | 450 F | 475 F |
| Olive | 84% | 14% | 375-400 F | 400-425 F |
| Corn | 83% | 13% | 450 F | 475F |
| Peanut | 80% | 20% | 450 F | 475 F |
*Note – Most refined Avocado oils have a very high smoke point. Home ovens do not usually achieve a high enough temperature to properly season cast iron when using Avocado oil.
How To Season Cast Iron: Step-By-Step Instructions
We’ve covered what seasoning is, the science behind how it works, and which oils are best to use. Now, let’s walk step-by-step through the process of seasoning your cast iron cookware so it will provide you with a lifetime of great cooking.
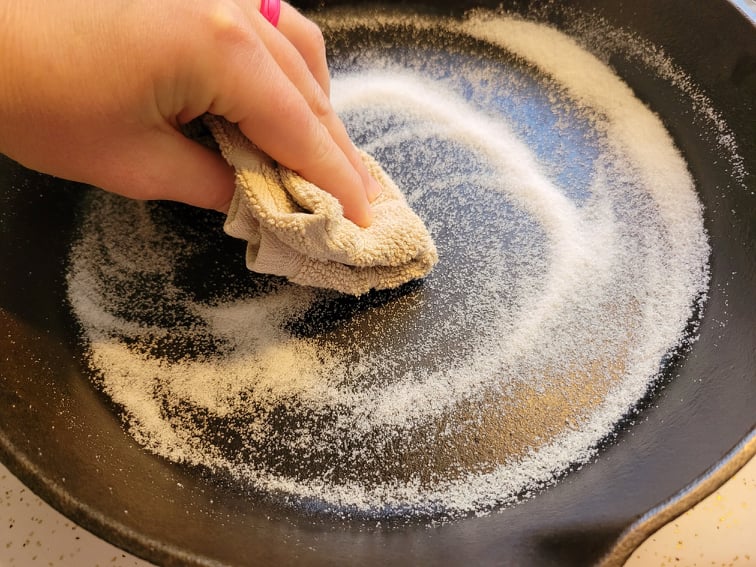
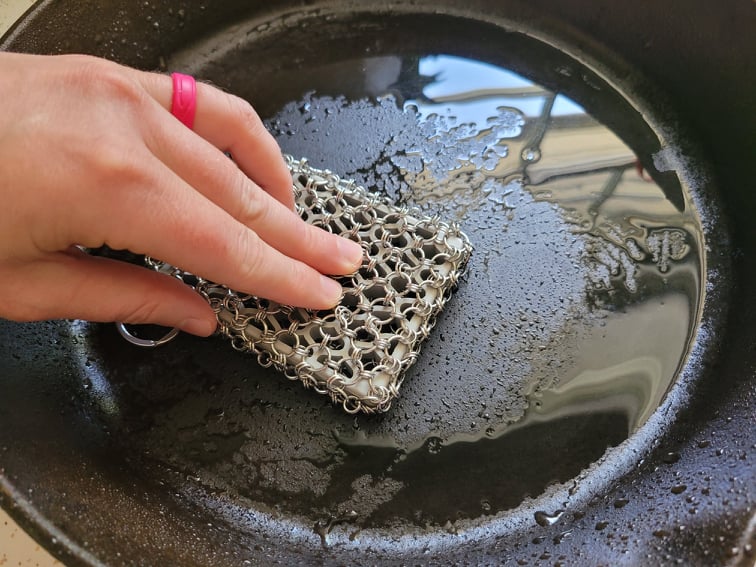
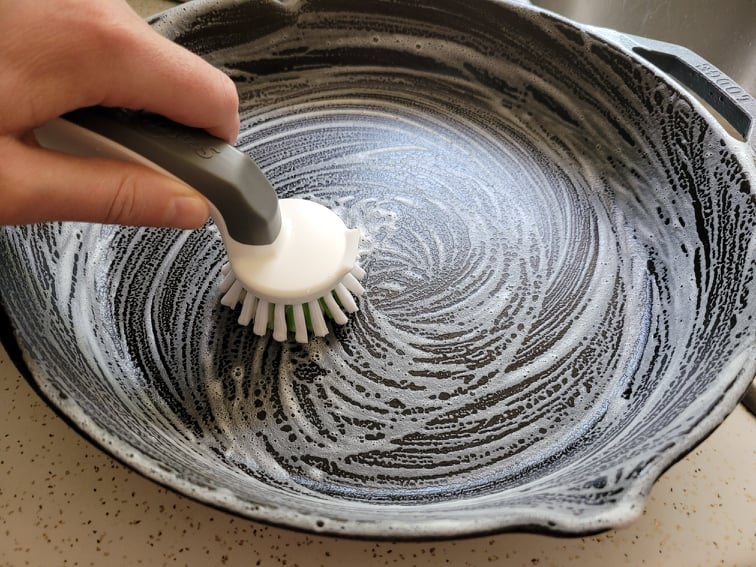
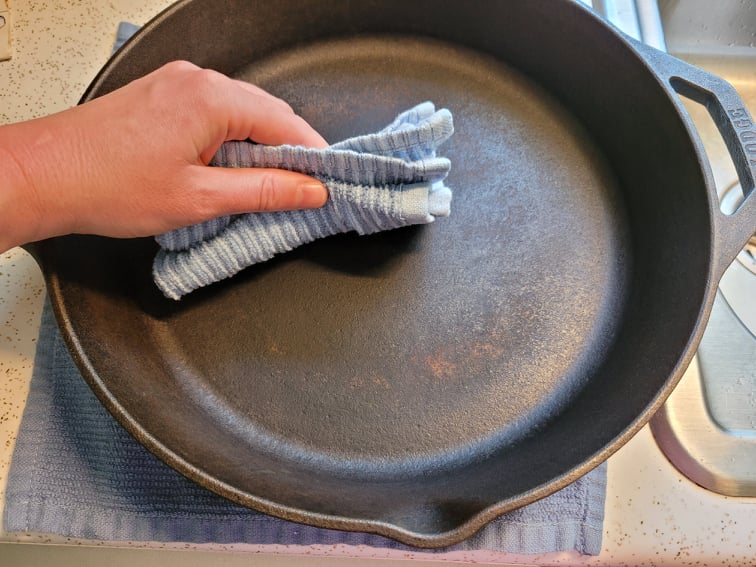
Step 1: Clean Pan Thoroughly
Whether your pan is brand new or you’ve already been using it, you’ll want to clean it thoroughly before seasoning it. This allows the oil to properly polymerize and form a strong bond with the iron.
I always like to start by doing a salt scrub or using a chain mail scrubber to remove any dirt, food particles, or bits of old, flaky seasoning. According to Field Company, a premium cast iron skillet manufacturer, “…Chain mail scrubbers also help you build up a stronger seasoning over time. They do this by gently scuffing the top layer of seasoning, creating a textured surface that gives new seasoning something to grab on to.”
Next, give your pan a good wash with soap and water, but don’t let it soak, or you’ll be dealing with rusty iron. Yes, soap is okay to use here because you’ll be adding a new seasoning layer in the upcoming steps.
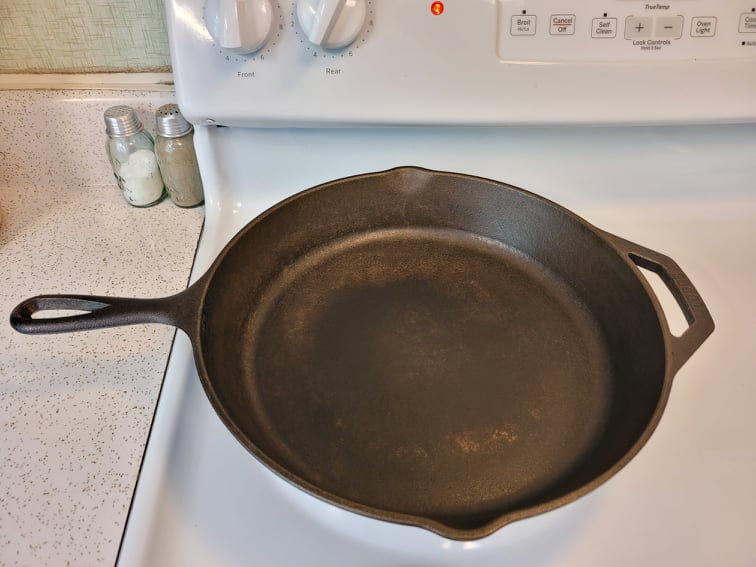
Step 2: Dry Pan Completely
After washing your pan, make sure to dry it completely. Never let cast iron drip dry, as moisture will become trapped in the tiny pores of the iron and cause rusting.
The best way to ensure cast iron is completely dry is to wipe it off with a towel, then heat it on a stove burner or in the oven on a medium heat setting for a few minutes. Any moisture in the iron will evaporate and leave behind a clean, dry surface that’s ready to accept a new layer of seasoning.
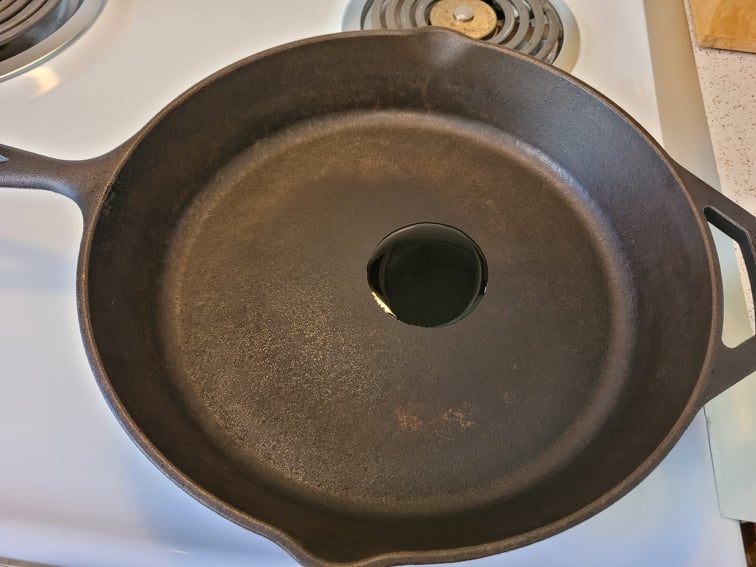
Step 3: Pre-Heat And Lightly Oil Pan
Pre-heat the pan in the oven at 200 degrees Fahrenheit for 10 minutes to expand the pores of the cast iron. This better prepares the iron to accept the coating of oil that will soon be transformed into a layer of seasoning.
Next, carefully remove the pan from the oven and apply a very light coat of oil to both the inside and outside of the pan. A little bit goes a really long way! The key to a successful seasoning layer is an extremely thin coat of oil on the iron. Rub the oil all over the pan with a lint-free cloth. Pro tip: Try to avoid using paper towels to rub the oil in because tiny paper fibers end up getting caught all over the rough surface of the iron (Trust me on this one!).
Once the oil is applied, take another clean, lint-free cloth and buff all surfaces of the pan to remove excess oil. You want to wipe it off really well, as if you’re trying to remove all the oil you just applied. There will still be plenty of oil in the tiny pores of the iron to produce a good seasoning layer and you won’t have a streaky, sticky mess.
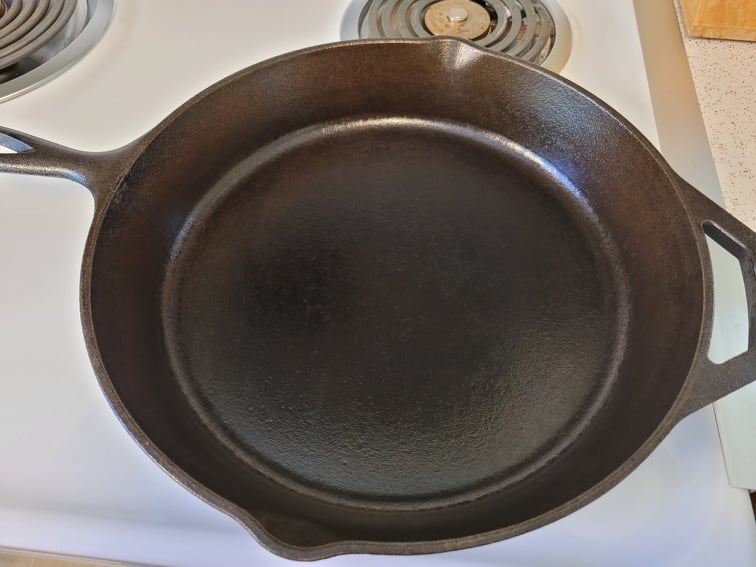
Step 4: Heat In Oven
Preheat your oven to the recommended temperature. It should be higher than your chosen oil’s smoke point (see reference chart above). It’s also a good idea to put a piece of aluminum foil or a baking sheet on a lower rack under the cast iron to catch any oil that may drip during the heating process.
Place your oiled pan upside down on the middle oven rack and heat it for an hour. Remember, you’re heating the oil past its smoke point to get the polymerization reaction to occur, so don’t be alarmed when you see or smell some smoke coming from the cast iron while it’s in the oven. When the hour is up, turn off the oven but don’t take the cast iron out right away. Crack the oven door open a few inches and let the pan gradually cool off until it is safe to handle.
Some people choose to season cast iron on an outdoor grill to avoid the smoky smell in the house. While this option works also, it can be harder to maintain the appropriate temperature on a grill. If you choose this method, just make sure to monitor the temperature frequently. Make sure to use a very thin coat of oil that won’t drip when the pan is heated upside down, and watch for potential flame flare-ups.
I don’t recommend seasoning a pan on the stovetop. The burner doesn’t heat the bottom and sides of the pan evenly and will produce a very patchy seasoning layer that tends to flake off.

Step 5: Oil, Heat, Repeat
The key to successful, near-bulletproof cast iron seasoning is the application of multiple, thin layers of seasoning. You may think it would just be easier to use a lot of oil at once and bake on one thick seasoning layer. But, I assure you, it doesn’t work like that. The polymerization process requires the oil to be in contact with both the metal pan and oxygen. If too much oil is used, the chemical reaction can’t properly occur and you’re left with a goopy, sticky mess.
For new cast iron pans or cookware that has been recently stripped down to the bare metal, it’s wise to repeat the seasoning process two to three times in a row (oil, heat, cool in oven, repeat) to build up a really strong, easy-release finish.
(psst… Wondering how to clean and sanitize cast iron cookware while camping? Check out this article!)
How Often Should You Season Cast Iron Cookware?
Once your cast iron cookware has been seasoned initially, it really only needs to be seasoned again a few times per year. Typically, a cast iron pan with a strong base layer of seasoning will continue to improve with use over time. However, there are a few instances where you’d want to re-season a pan, such as if it is beginning to appear rusty or a dull grey color, if you notice the seasoning layer flaking, if food is sticking to the pan, or if you’ve cooked acidic foods for a long period of time (think simmering homemade marinara sauce), as this can eat away at the seasoning layer.
Cast Iron Troubleshooting / FAQ’s
Do you love your cast iron cookware but sometimes encounter pan problems? Here are some common cast iron questions and easy solutions.
Why Is My Cast Iron Pan Sticky After Seasoning?
If your cast iron feels sticky after seasoning it, the oil did not properly polymerize and bond with the metal. This is usually for one of the following reasons:
- Too much oil was used on the pan.
- The oven temperature was not high enough to heat the oil beyond its smoke point.
- The pan was not heated long enough.
To fix this problem, wipe off any excess oil and heat the pan upside down at 450 – 475 degrees for an hour.
Why Is My Cast Iron Pan Streaked / Blotchy After Seasoning?
Streaky marks or a blotchy, patchy pattern can occur after seasoning cast iron for these reasons:
- Too much oil was used and dripped down the side or pooled in the pan during seasoning creating streaking or thicker, patchy-looking areas.
- The pan requires additional rounds of seasoning to build up a smooth, uniform layer.
To fix this problem, make sure the entire pan has a very thin coating of oil on it and wipe off any excess. Re-season one or two more times at the appropriate temperature for the oil used (see chart above) for an hour.
Why Is The Seasoning Coming Off My Cast Iron Pan?
Sometimes, you might notice bits of seasoning flaking off your cast iron pan. This usually means the seasoning layer was not fully bonded to the metal. It is not dangerous to your health. Follow the directions above to scrub, clean, and re-season your pan once or twice before using it again.
Can You Use Soap To Clean Cast Iron?
Yes, you can use soap when washing your skillet. Many years ago, dish soap was lye-based. It was too harsh to be used on cast iron and would destroy the seasoning layer. Just make sure to use gentle dish soap or unscented castile soap, then dry the pan well. Apply a thin layer of oil to the cooking surface, then buff it off with a cloth before storing.
Conclusion
Now you know how to properly clean and season your cast iron cookware. It’s not difficult, and with a little practice, the process becomes like second nature. Here’s to many more years of enjoyable cast iron cooking!
This post may contain affiliate links. This means if you click on a link and make a purchase, I will receive a small commission, at no cost to you, that makes it possible for me to keep the Campfires and Cast Iron site up and running. Please see our disclosure policy for details.

Very good article and very easy to understand. It covers all the questions I have and told me some things that I didn’t know that I needed to know. 🙂 It’s the first time I have read an explanation about the smoke and going beyond the smoke point.
The pics are really good too
Thank you! I’m glad you found this article helpful.