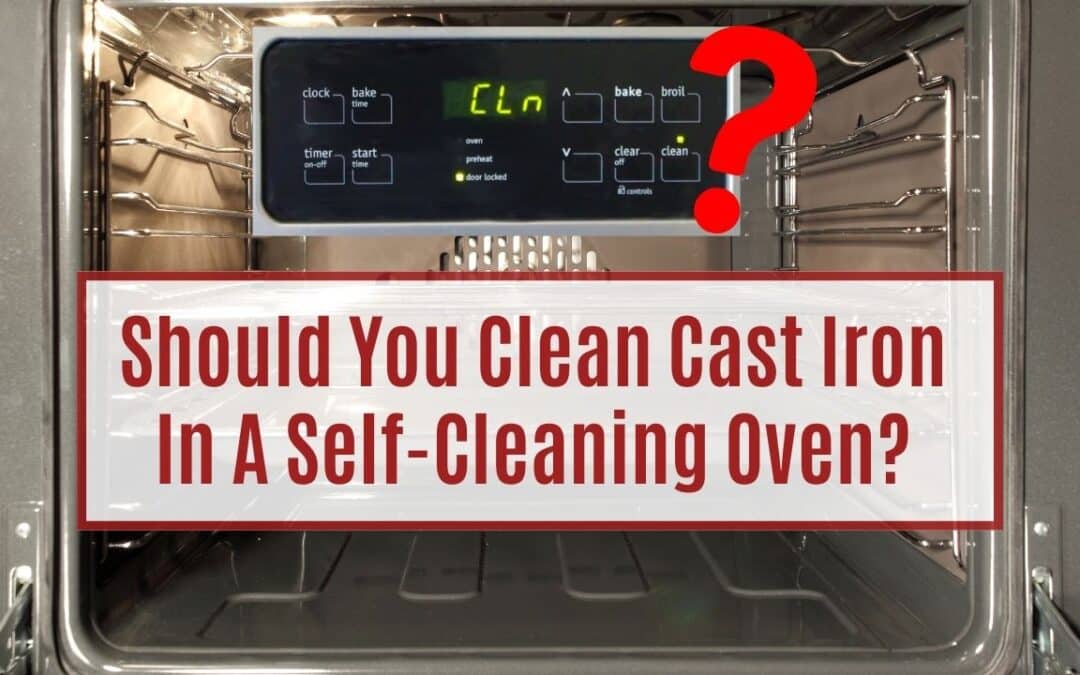
Do you have a piece of dirty, rusty, or crusty cast iron cookware you’re trying to strip and restore? Then you’ve probably come across the suggestion to clean your cast iron in a self-cleaning oven.
While this method sounds easy and requires minimal effort, should you really clean cast iron in a self-cleaning oven? As a cast iron restoration professional, here’s my take on cleaning or stripping cast iron in the oven:
DO NOT attempt to strip or clean cast iron in a self-cleaning oven. It is a fire hazard, and the extreme temperature can warp, crack, or ruin your cast iron cookware. Safely remove rust by scrubbing with steel wool and soap or using a vinegar bath. Strip old seasoning with a lye bath or electrolysis.
In this article, I’ll explain why a self-cleaning oven is not a good way to clean cast iron. I’ll also show you ways to remove rust and old seasoning from your cast iron cookware without damaging it.
What Does A Self-Cleaning Oven Cycle Do?
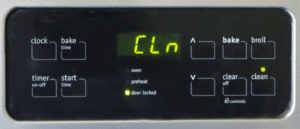
The self-cleaning cycle heats an oven to more than 900 degrees Fahrenheit for three to five hours. This extremely high temperature basically incinerates any grease residue and crumbs in the oven, turning them into ashes that can easily be cleaned up.
In theory, the self-cleaning cycle works to clean cast iron by literally burning off the old seasoning and large rust flakes. Some people use this method to strip cast iron pans down to bare metal to prepare them for new seasoning. But be advised, it isn’t all it’s cracked up to be.
Why You Shouldn’t Clean Cast Iron In A Self-Cleaning Oven
While the intense heat from a self-cleaning oven cycle definitely removes old seasoning, sticky oil, and food residue from a cast iron skillet, it’s not a safe method to use. Here’s why:
Warping, Cracking, and Discoloration
When cast iron is exposed to extreme heat, it can warp, crack, or permanently discolor.
Have you ever placed a cast iron skillet on a level surface and noticed it wobbled, spun around easily, or didn’t sit flat? This means the bottom of the pan is warped, or bowed out. Warping happens when a cast iron pan is heated so intensely that the molecular structure of the iron actually changes, causing it to expand and change shape.
Older cast iron pans were made a little lighter and thinner than today’s models, making them even more susceptible to warping and cracking. While a slight warp might not matter for everyday cooking, a cracked cast iron pan is no longer safe to use and is considered ruined. You definitely wouldn’t want to ruin your favorite pan or a collectible antique cast iron skillet by trying to strip it in a self-cleaning oven!
It Doesn’t Remove Rust
The intense heat can loosen larger flakes of rusty metal from cast iron, but it won’t remove widespread rust covering the pan. You’ll still have to use alternative methods, such as a vinegar bath or scrubbing with steel wool, to remove rust.
It’s A Fire Hazard
The oven’s self-cleaning cycle by itself is a fire hazard. Any time you expose grease and food crumbs to extremely high heat, you run the risk of starting a fire. Additionally, the oven door locks itself for several hours during and after the self-cleaning process. This is a safety feature designed to prevent burns and limit oxygen inside the oven in efforts to suppress a fire, should one start from the burning of grease residue.
But what happens if your cast iron skillet catches fire during the self-cleaning cycle? Unfortunately, you’re out of luck. You won’t be able to open the oven door to extinguish the flames or remove the pan. This type of situation is extremely scary and can get out of hand really quickly. The oven isn’t designed to have anything inside it when running the self-cleaning cycle. This is why I always advise against trying this cast iron cleaning method.
It Can Damage Or Ruin Your Oven
The extremely high heat over several hours’ time is really hard on your oven. Ovens equipped with a self-cleaning cycle are susceptible to damage in the form of overheated wiring and electronics, burnt-out thermostats, and stuck door latches. Many appliance repair companies advise customers not to use this feature due to the volume of service calls related to self-cleaning oven breakdowns and incidents.
Why You Shouldn’t Clean Cast Iron In A Fire
People often tell me, “Oh, I just build a big fire, throw the skillet in, and let it burn for a few hours.” But the same self-cleaning oven principle applies to attempting to clean or strip cast iron cookware in a wood stove or an open fire. Too much heat equals warping and cracking.
For example, I recently went to a yard sale to purchase an antique, collectible Griswold cast iron skillet I saw advertised. The skillet looked pretty good overall. It had recently been re-seasoned and was a shiny, black color. I spoke with the seller and commented on how good the skillet looked for its age. He proudly told me he had just finished “cleaning and restoring it” by throwing it in the bonfire before seasoning it. I tried to hide my cringing facial expression.
When buying used cast iron, I always check for warps, cracks, and defects. In this case, I’m really glad I did. I set the skillet on a flat table, and it immediately rocked back and forth. It even spun around in a circle easily. The bottom of the pan was warped. Unfortunately, there’s no way to correct warped cast iron. This once-valuable collector’s item from the 1950s was no longer worth what it could have been because of heat damage. I thanked the seller for his time and politely passed on the sale.
How To Safely Clean Cast Iron
Now that we’ve established why cleaning and stripping cast iron using heat from a self-cleaning oven or a fire isn’t a good idea, let’s look at ways to safely clean cast iron cookware.
For routine cleaning after use, simply wash your cast iron pan with mild dish soap and water. Yes, soap is fine to use on cast iron! Many years ago, when dish soap was lye-based, it was too harsh and would destroy the seasoning layer. Today’s modern dish soaps are much gentler and are safe to use on cast iron cookware without removing the seasoning.
If you choose not to use soap on your cast iron, that’s fine, too! If you’re concerned about whether or not cast iron pans are sanitary if they’re not cleaned with soap, check out this interesting article.
Make sure to dry the pan really well with a towel after washing it. You can also place it on a stovetop burner over low heat for a couple of minutes to evaporate any remaining moisture and prevent rust.
How To Remove Rust From Cast Iron
When removing rust from cast iron cookware, you’ll always want to start with the least aggressive method first. If that doesn’t work well enough, move to the next method.
Methods To Remove Surface Rust:
Stiff Bristle Brush Or Sponge
First, use a stiff bristle brush, such as one made from nylon or natural plant fibers, and dish soap to wash the pan. Polymer scrubber sponges are also great for removing light surface rust from cast iron. Avoid soaking the pan longer than about five minutes to prevent the formation of additional rust.
Lodge Rust Eraser
The Lodge Rust Eraser is a neat little tool that easily removes patches of rust from cast iron. Made of rubber and silicon carbide, you use it just like an art eraser, but on your cast iron cookware. Note that the Rust Eraser is an abrasive cleaning tool and will remove some seasoning along with the rust. But that’s not a problem! Simply re-season your cast iron and you’ll be good to go.
Steel Wool
Of all the cleaning options, steel wool is the most abrasive. It will remove both rust and the pan’s seasoning layer, often down to bare iron. After cleaning with steel wool, wash the pan with soap and water to remove metal particles and rust debris. Re-season the pan immediately after washing and drying it to prevent flash rust from forming on the unprotected metal.
To Remove Widespread, More Severe Rust:
Vinegar Bath
A vinegar bath is a useful method for loosening difficult or widespread rust. If your pan is completely rusty and scrubbing it with plenty of elbow grease just isn’t cutting it, try this:
1. Fill the sink or a plastic tub that is large enough to fully submerge the cast iron pan in with a 50/50 mixture of distilled white vinegar and water.
2. Let the pan soak for about 30 minutes. Rust removal with a vinegar bath often requires two or three 30-minute rounds of soaking and scrubbing for best results. You’ll need to keep a close eye on the pan, though. After the vinegar has dissolved the rust, it will start dissolving the iron underneath. This can cause permanent damage to your cast iron pan. Always set a timer when your pan is in the vinegar bath to prevent this.
3. After soaking, immediately rinse the pan in cool water to neutralize the vinegar and stop the rust-dissolving reaction.
4. Scrub the pan with a stiff bristle brush or steel wool and dish soap. Rinse it well to remove rust particles and prepare the metal for re-seasoning.
How To Safely Strip Seasoning From Cast Iron
If you’re looking to completely strip away rust, gunk, and old seasoning down to bare iron, the best options are a lye bath or electrolysis. Both of these methods are a little more advanced and require some safety precautions, but they’re the safest for cast iron.
Lye Bath
A lye bath is made of pure lye crystals (sodium hydroxide) dissolved in water. The lye bath will dissolve any organic matter, such as oil, grease, and old seasoning, stripping cast iron down to bare metal. This method is beginner-friendly and inexpensive, and the materials are easy to find. This makes a lye bath the top choice of many people who are new to cast iron restoration or who only have a small number of pieces to restore.
Remember that lye is extremely caustic and can cause chemical burns to your skin and eyes, so always wear eye protection and rubber gloves when working with it.
It’s easier to watch a video explaining how to set up a lye bath than to read about it. If you’re interested in using lye for cast iron stripping, watch this video from Stephen Strawn’s Cast Iron Cookware channel for step-by-step directions.
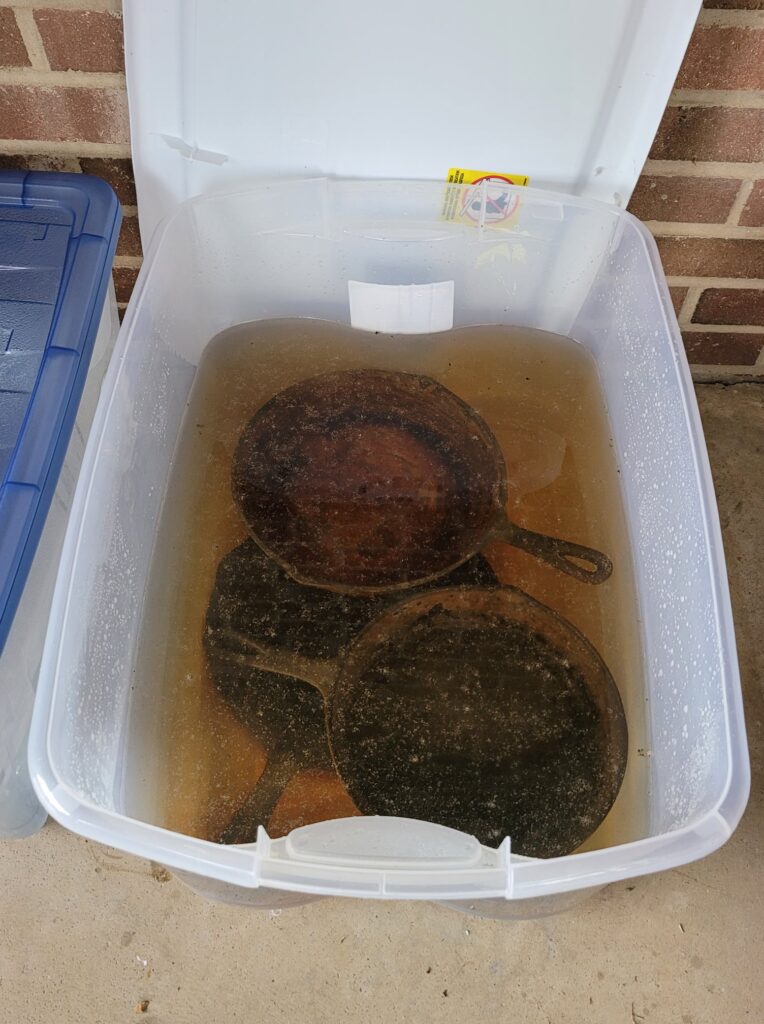
The photo below shows three skillets soaking in my lye bath container.
Electrolysis
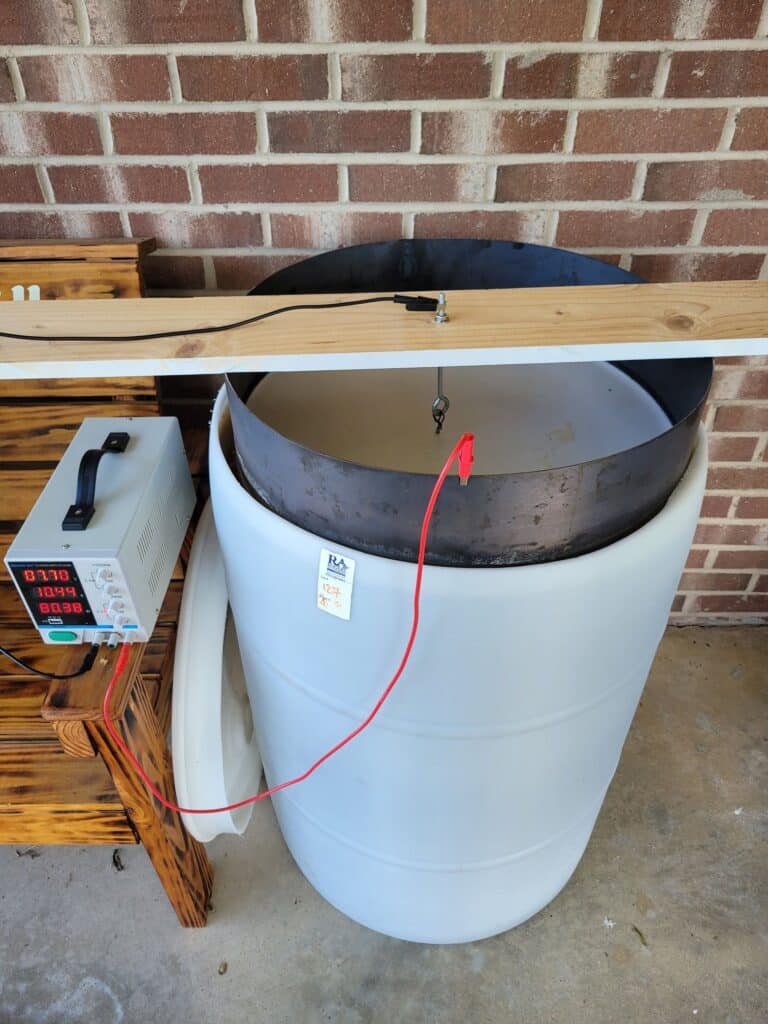
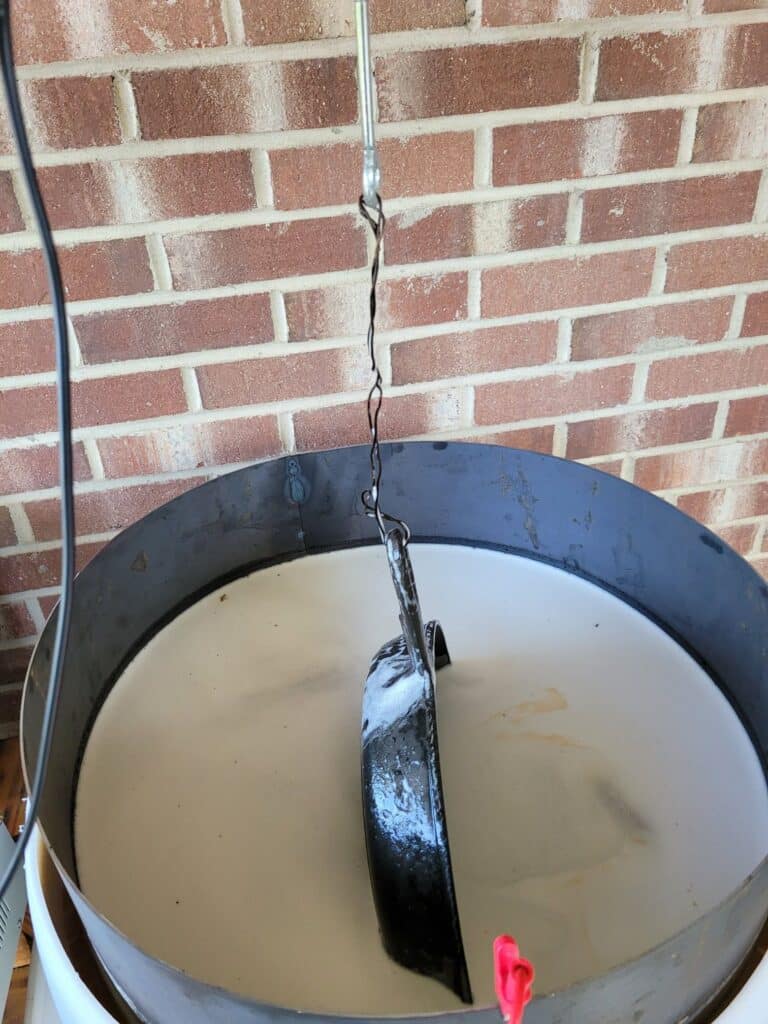
An electrolysis tank, or E-tank, is an extremely useful and efficient tool for removing both rust and old seasoning from cast iron cookware. However, an E-tank is more expensive and requires quite a bit more work to set up than a lye bath. It involves a tank (or large plastic container) full of an electrolyte solution dissolved in water, a sacrificial steel or iron anode, and a power source, which is usually a manual car battery charger or a DC power supply unit.
The word electrolysis means “to break down using electricity,” and that’s exactly what this method does. When explaining how electrolysis works, I tell people it’s like chrome plating, but in reverse. By connecting the positive lead of the power source to the sacrificial anode and the negative lead to the cast iron pan, the electrical current runs through the cast iron and repels seasoning, dirt, rust, and cruddy buildup off of the metal.
To learn more about electrolysis tank basics, watch this video.
The photos below are of my E-tank setup.
How To Season Cast Iron Cookware
After removing rust, washing, and drying your pan, you’ll need to re-season it. Seasoning cast iron cookware can seem confusing or intimidating at first, but it’s really quite simple!
What Is Cast Iron Seasoning?
Cast iron seasoning is essentially multiple thin layers of oil baked onto the surface of the pan. This is done at a high temperature, which causes the liquid oil to bond with the iron on a molecular level and transform into a slick, hard surface through a process called polymerization. This creates the smooth, easy-release finish you want on a cast iron pan. A strong seasoning layer also protects your pan from rust.
Cast Iron Seasoning Instructions
1. Wash The Pan Thoroughly
Wash the pan with dish soap and water to remove dirt, grease, and food residue. Use a scrubbing sponge or nylon brush. Avoid steel wool or scouring pads.
2. Dry and Pre-Heat The Pan
Dry the pan with a towel, then heat it on a stovetop burner over low heat for 5 minutes or in the oven at 200 degrees F for 5-10 minutes to evaporate moisture and prepare the iron to accept new seasoning.
3. Lightly Oil and Buff The Pan
When the pan is cool enough to handle, apply a very light coat of oil or seasoning wax to all surfaces. Use a lint-free cloth to buff the pan and remove excess oil.
4. Heat The Pan In The Oven
Heat the oiled pan upside down in the oven at 450 degrees F for one hour. When done, crack the oven door open to vent and allow the pan to cool. Repeat this process 2-3 times for the best seasoning layer.
Feel free to download and print my helpful seasoning quick guide!
Also, be sure to check out my full-length article, “Seasoning Cast Iron Cookware: A Step-By-Step Guide,” for more detailed information about cast iron seasoning, care, and troubleshooting.
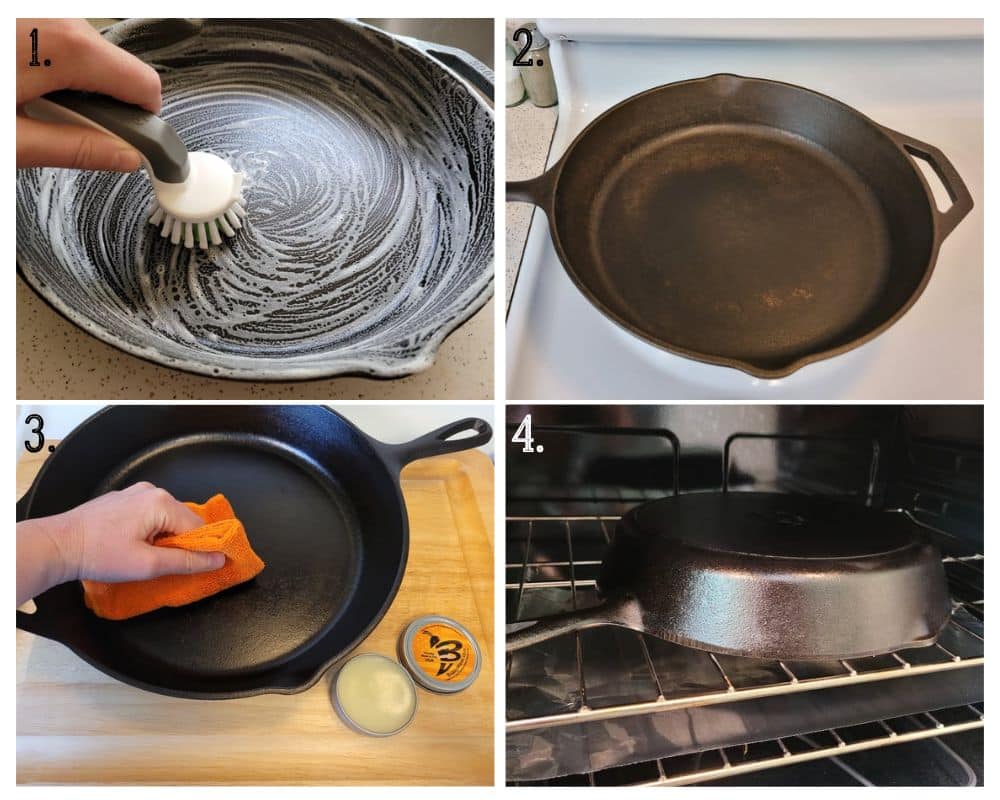
1. Wash 2. Dry 3. Oil 4. Heat
Campfires and Cast Iron Restoration Services
With a good understanding of what methods safely clean and strip cast iron and a little practice, anyone can successfully restore cast iron cookware at home. But, not everybody has the time, resources, or desire to restore cast iron themselves.
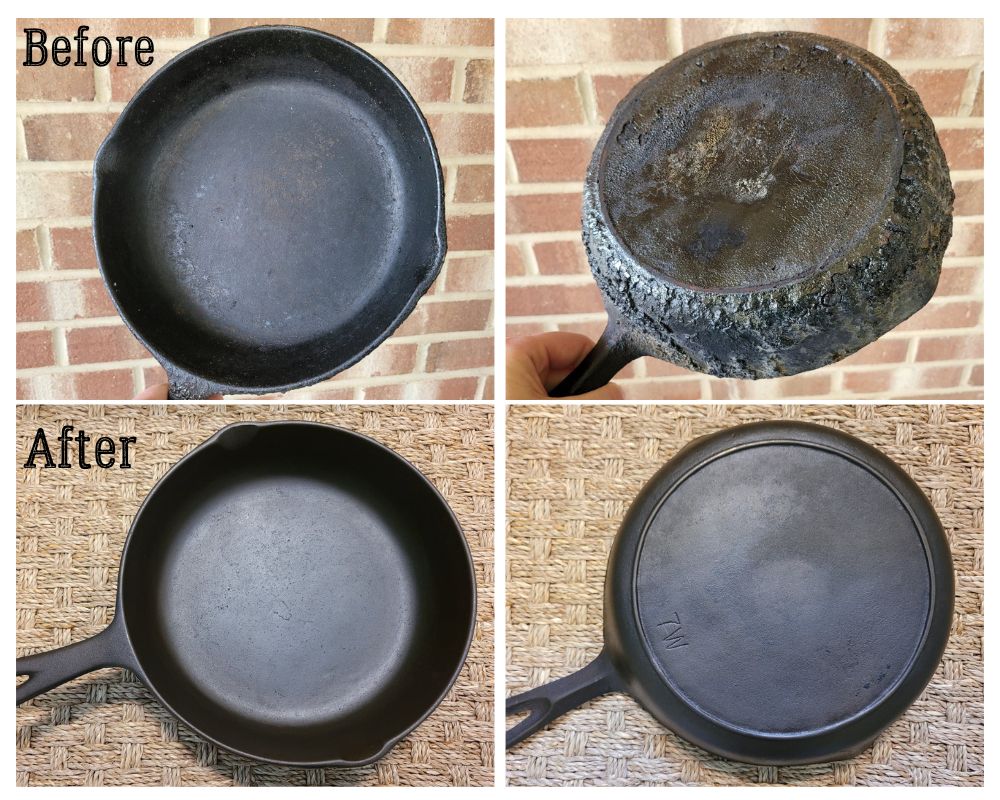
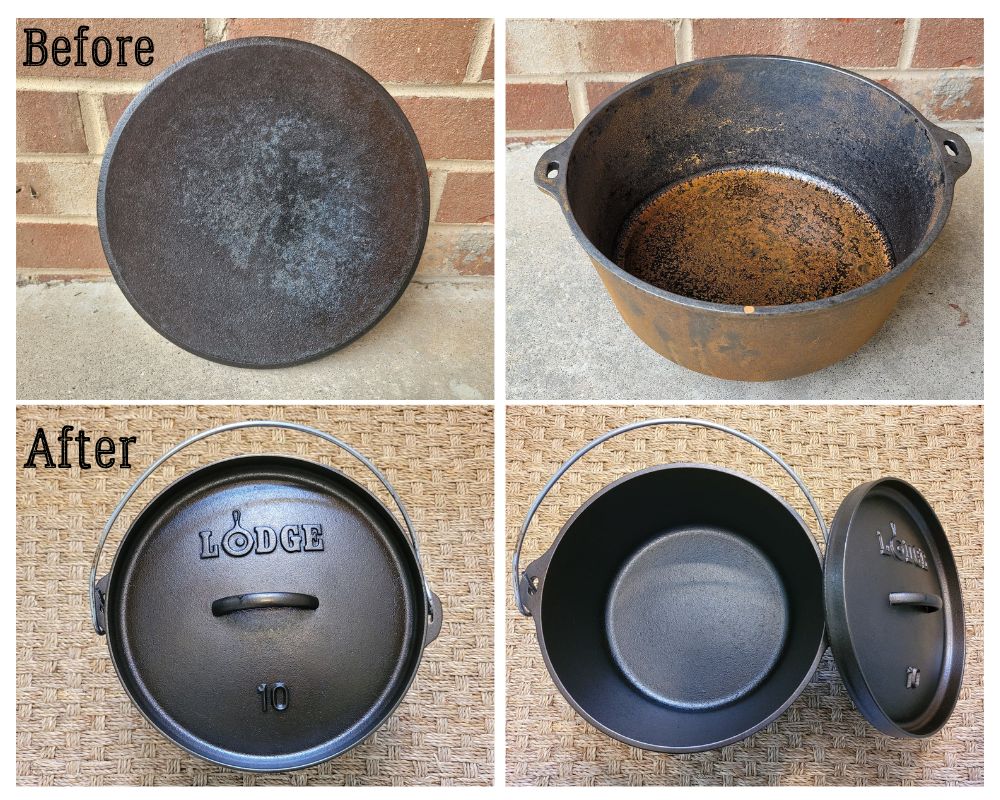
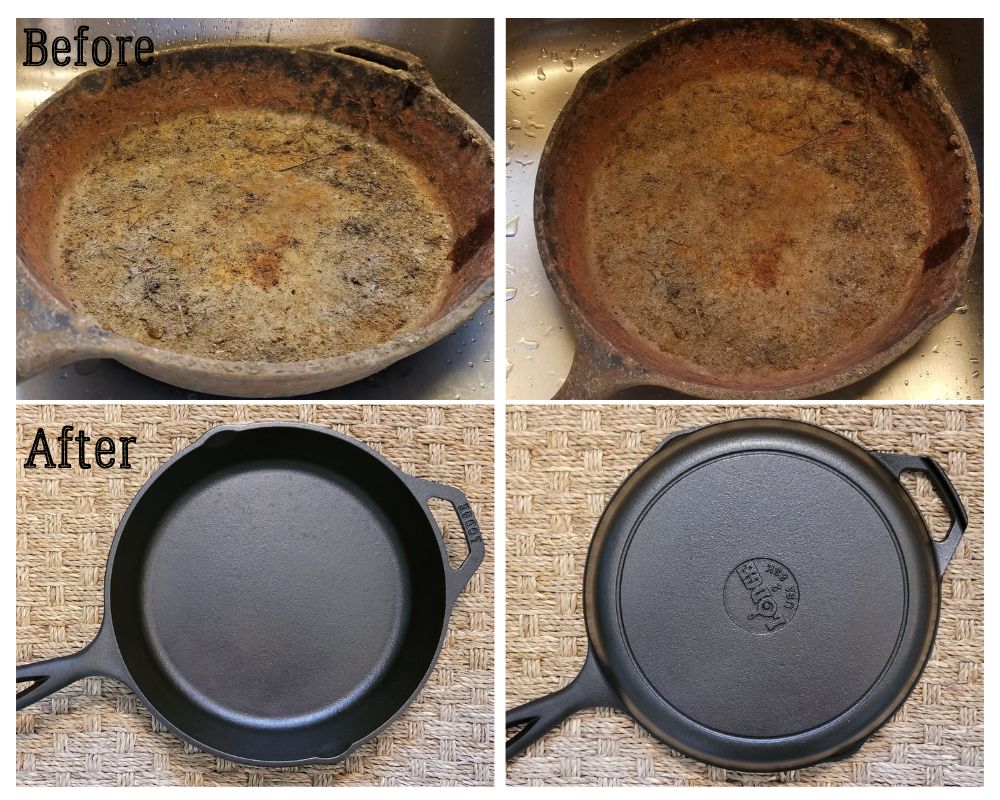
That’s where Campfires and Cast Iron comes in! We offer professional cast iron restoration services that safely remove years of rust and cruddy buildup from vintage, heirloom, or contemporary cast iron cookware.
Check out our Restoration Services page for details, pricing, shipping info, and amazing before and after photos!
This post may contain affiliate links. This means if you click on a link and make a purchase, I will receive a small commission, at no cost to you, that makes it possible for me to keep the Campfires and Cast Iron site up and running. Please see our disclosure policy for details.
