Whether you’re new to camp dutch ovens or you’ve had some experience, it’s important to have the right dutch oven cooking tools available. When teaching others how to cook with a dutch oven, I am often asked for my opinion on certain dutch oven accessories. In response, I compiled this list of the top 20 most helpful dutch oven cooking tools and accessories to make your camp cooking experience fun and successful.
In this article, I’ll list my favorite dutch oven cooking tools, what they’re used for, and why I recommend them. These are items I use regularly when teaching dutch oven cooking classes and on my personal camping trips.
psst…Don’t forget to check out these delicious camping recipes!
Camp Dutch Oven

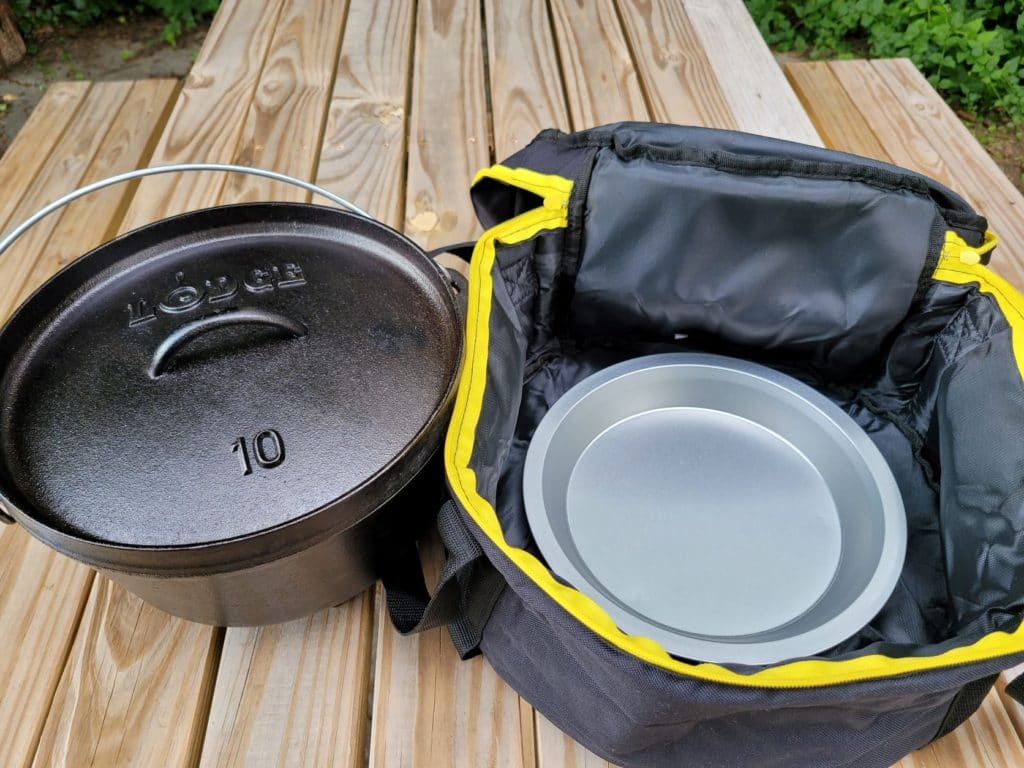
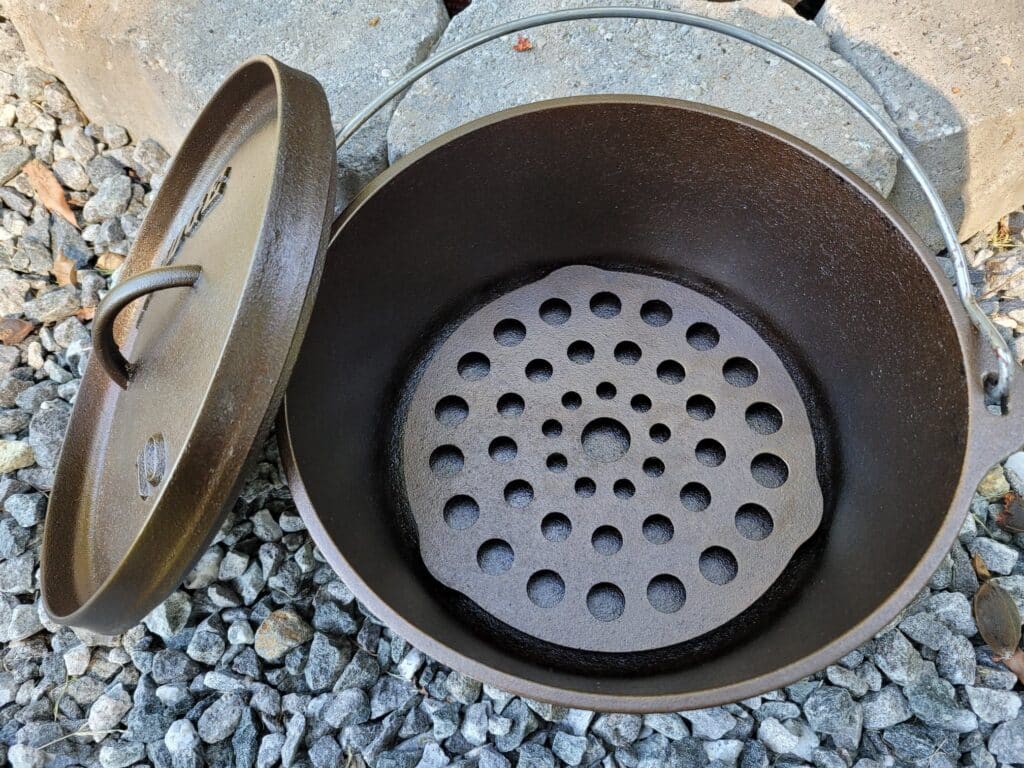
A 12-inch camp dutch oven with three legs, a flanged lid, and a wire handle is a good, versatile choice. Most camp dutch oven recipes are written for the 12-inch / 6-quart size. I prefer this Lodge brand dutch oven because it is made of durable, high-quality cast iron and manufactured in the USA.
Dutch Oven Tote Bag

A dutch oven tote bag is perfect for protecting your oven from scratches, bumps, and dings while traveling. It also makes transporting your dutch oven to and from your campsite much easier! I have this model and it has held up well to regular use.
As added protection for both my tote bag and the dutch oven’s legs, I put a cheap metal pie plate in the bottom of the bag, then put my dutch oven on top. Alternatively, you can stack the dutch oven on top of the lid to prevent the legs from wearing through the tote bag, as shown in the photos below.
See my article, How To Pack Cast Iron Cookware For Camping, for more photo examples and tips.

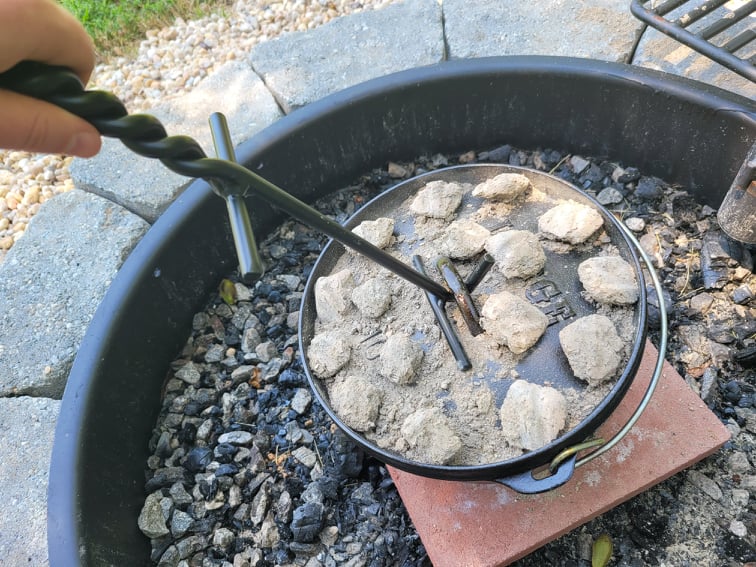
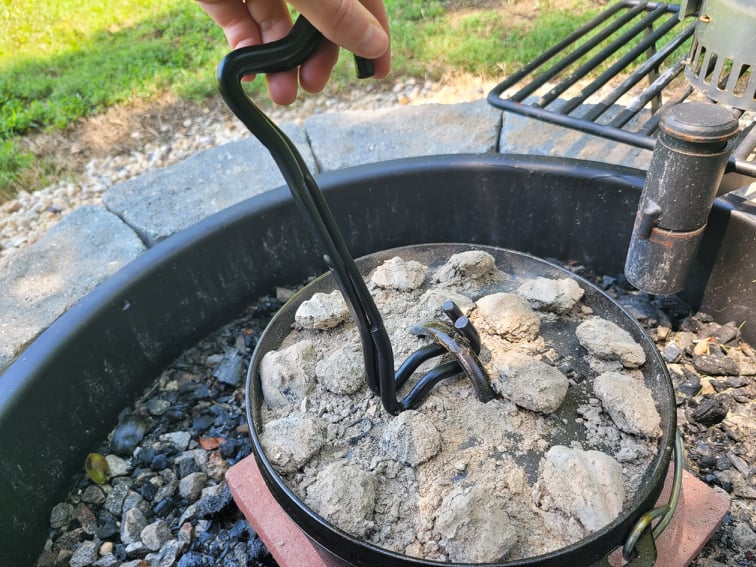
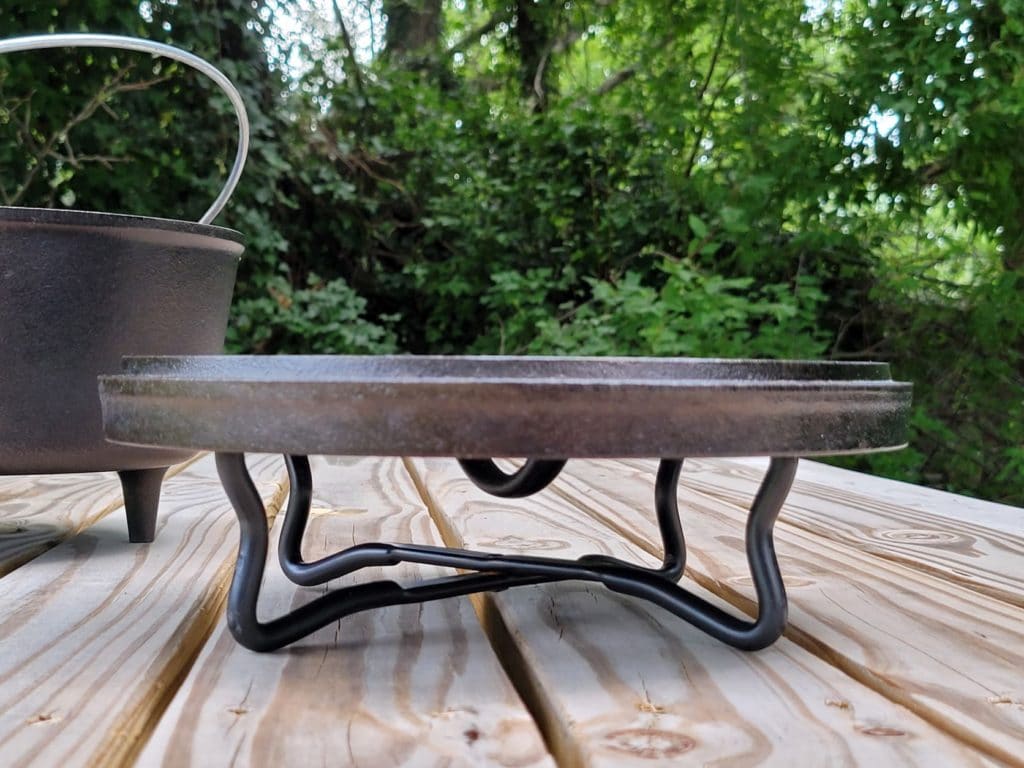
Dutch Oven Lid Lifters and Lid Stands


A lid lifter is one of the most essential dutch oven cooking tools! It is ideal for carefully maneuvering hot, charcoal-filled lids without getting your hands too close to the heat. Simply hook the lid lifter under the dutch oven lid’s handle and you have a safer way to lift, rotate, and remove the lid.
The lid multi-tool can be used as a lid lifter and also as a lid stand, as demonstrated in the photos below. I use my lid stand to hold the dutch oven lid in an upside-down position for use as a griddle over charcoal or campfire embers.
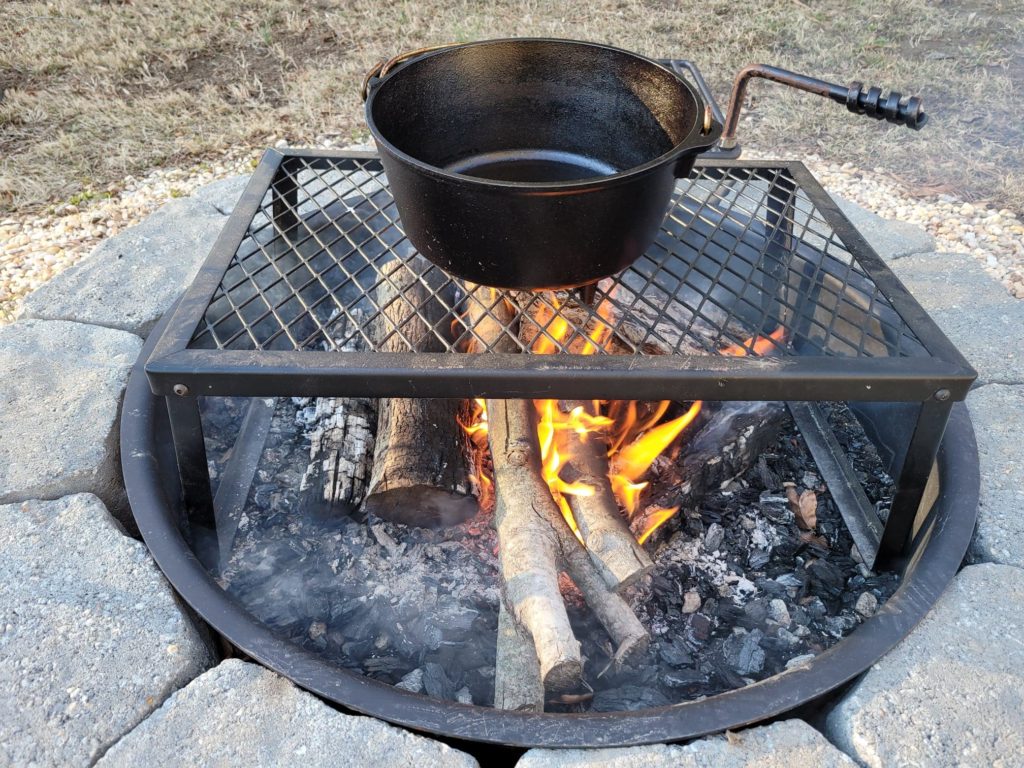
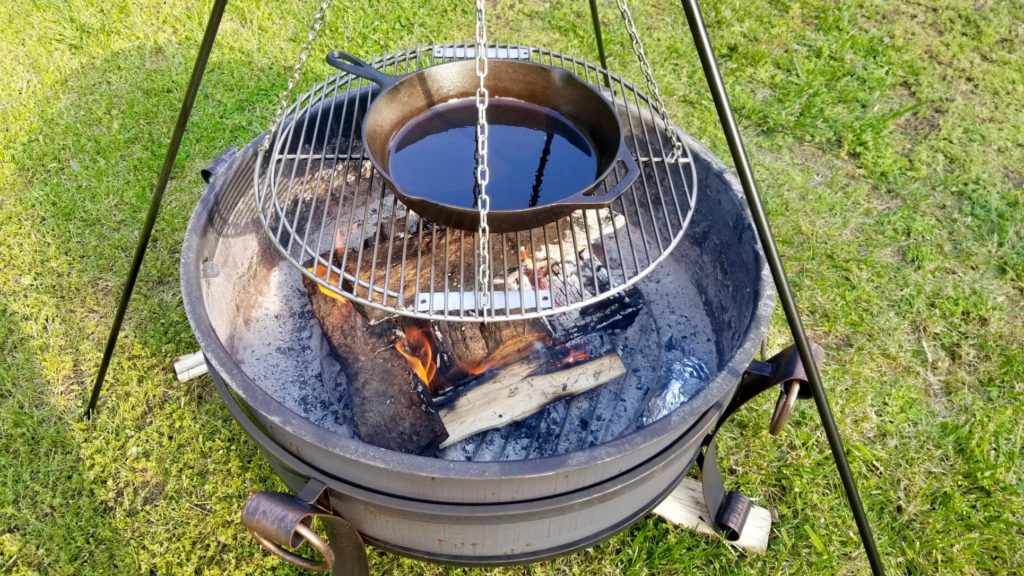
Campfire Cooking Grate

A campfire cooking grate is helpful for elevating your dutch oven above the flames when using it like a stockpot. I use my campfire grate when searing, sauteing, and making stews. The grate is particularly helpful if you don’t have a campfire tripod. A campfire grate can also be used as a grill and for cooking over the fire with cast iron skillets and griddles.
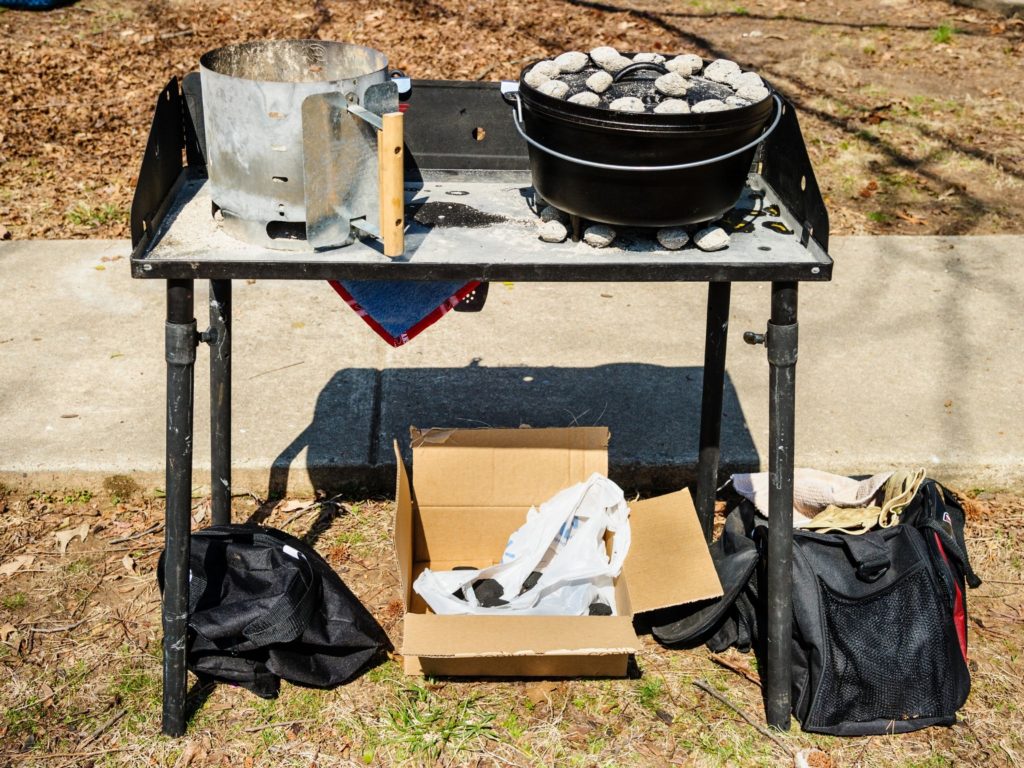
Dutch Oven Cooking Table


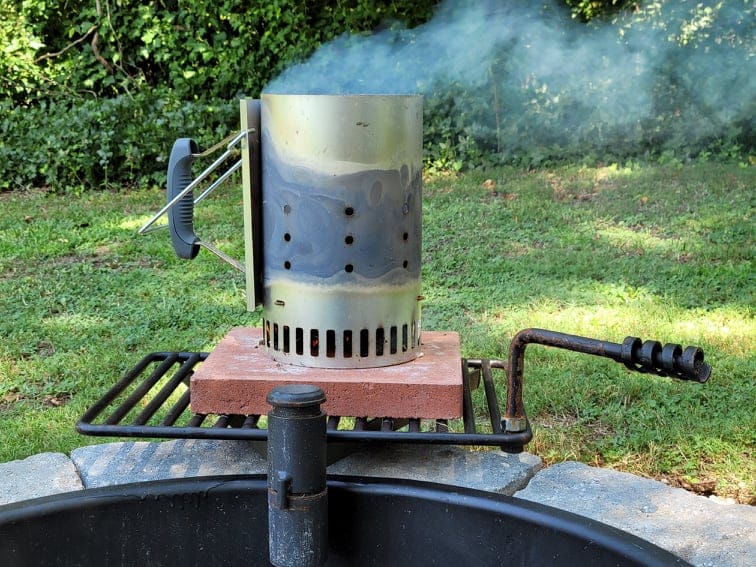
The Camp Chef dutch oven table may be one of my favorite outdoor cooking accessories. It elevates your dutch oven off the ground, eliminating the need to bend over repeatedly (lower back muscles, rejoice!). The flat, heat-resistant table also provides a perfect surface for preparing charcoal briquettes in a chimney starter.
The optional carrying bag makes transporting and storing your dutch oven table a lot easier, too!
Heat-Resistant Gloves

When working with a hot cast iron dutch oven and glowing-red charcoal briquettes, heat-resistant gloves are a must! These gloves are heat-resistant up to 900 degrees F and washable. I often prefer this type of glove over thicker leather gloves or mitt-style gloves, as the thinner, 5-finger design allows for improved dexterity while working with hot cooking tools.
Long-Handled Tongs

Long-handled tongs are really helpful when reaching into the charcoal chimney starter or under the dutch oven to arrange hot coals. I use the tongs and heat-resistant gloves together for safety when positioning cooking coals.
Charcoal Chimney Starter

A charcoal chimney starter is another one of my favorite dutch oven cooking tools. If you’ve ever tried to light charcoal for a grill or dutch oven, you know how much of a pain it can be while waiting for your coals to be ready to use. This is where the charcoal chimney starter comes in handy. It saves so much time and frustration by preparing charcoal for use in a matter of minutes. Just remember not to use Match Light or quick-light type charcoal, as these are pre-coated in lighter fluid and are dangerous for use in a chimney starter.
If you’re not sure how to use a chimney starter, check out this article for step-by-step directions: How To Use A Charcoal Chimney Starter
Fire Starter Squares

These fire starter squares pair perfectly with a charcoal chimney starter. Instead of using crumpled-up newspaper in the base of your chimney starter, use one of these fire starter squares. They are non-toxic, made of natural sawdust and wax, and light charcoal quickly. I also use these for starting campfires. Win-win!
Ash Pail and Shovel


Safely disposing of used charcoal and hot embers is the responsible thing to do in public parks and campgrounds. It is also extremely important to avoid accidentally starting a wildfire.
Did you know that used coals and embers can stay hot enough to melt plastic or start a fire for three or more days? This is why it’s best to break up used coals, drown them with water, then use a shovel to scoop the ashes and embers into a metal ash disposal pail with a locking lid.
Store used coals, ashes, and embers in the ash pail for 5 days. Then, transfer the ashes from the pail to double-layered plastic bags or wrap them in aluminum foil. Seal the bags or foil tightly, then place them in the trash dumpster.
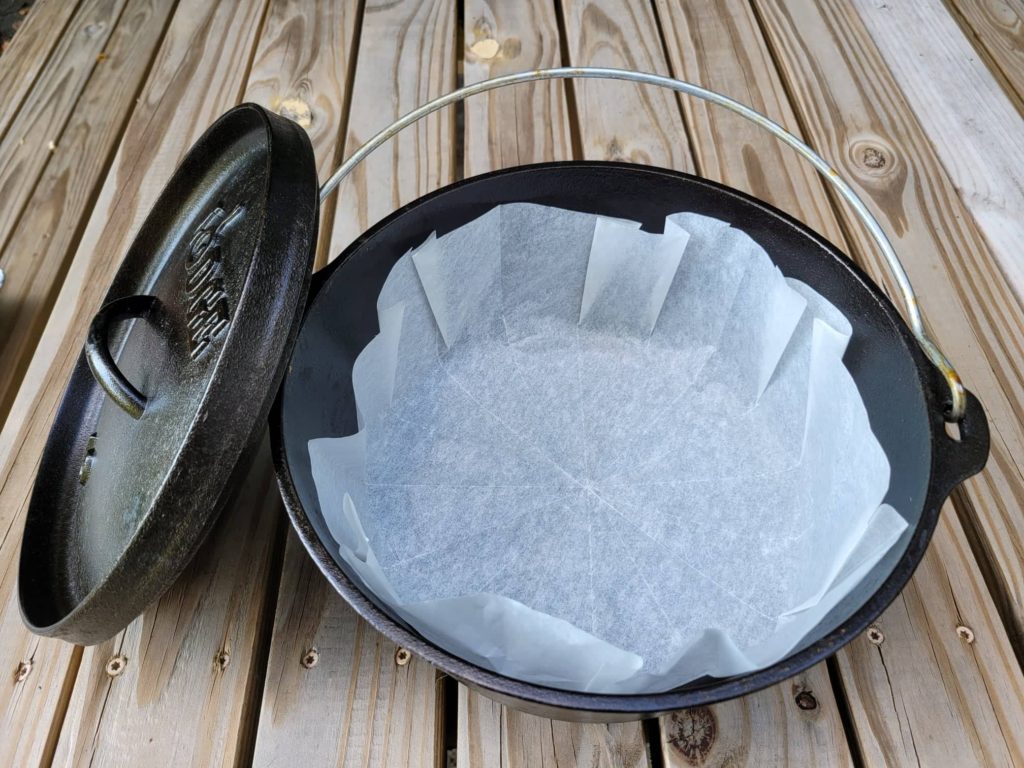
Dutch Oven Liners


Dutch oven liners help make quick work of clean-up by providing a barrier between your food and the dutch oven. Liners are available in parchment paper or aluminum. The aluminum version is much more sturdy and ideal for meals where you may want to lift the liner out of the dutch oven for serving.
Dutch Oven Charcoal Temperature Chart Magnet

When cooking with a cast iron camp dutch oven and using charcoal as the heat source, this dutch oven charcoal temperature chart magnet is helpful for knowing the number of coals you’ll need to reach your desired cooking temperature. Stick the magnet on your fridge, cooler, or inside your dutch oven for quick access to this important information while camping.
Want to know more about dutch oven cooking with charcoal? Check out this article, complete with a printable dutch oven temperature chart!
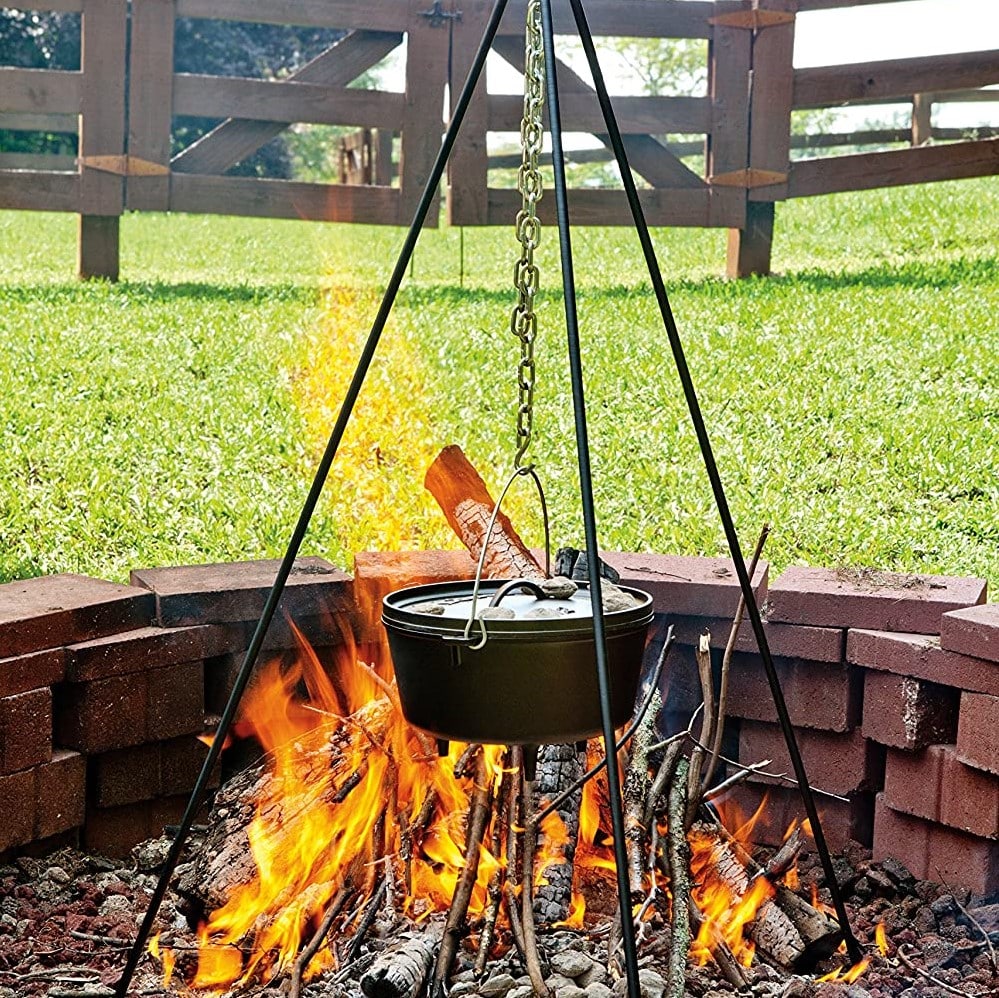
Tripod

A camp tripod is the perfect tool for hanging your dutch oven over the campfire. The model pictured above has adjustable legs, making it easy to hang your dutch oven at just the right height. This convenient feature also allows you to fold the legs down for storage.
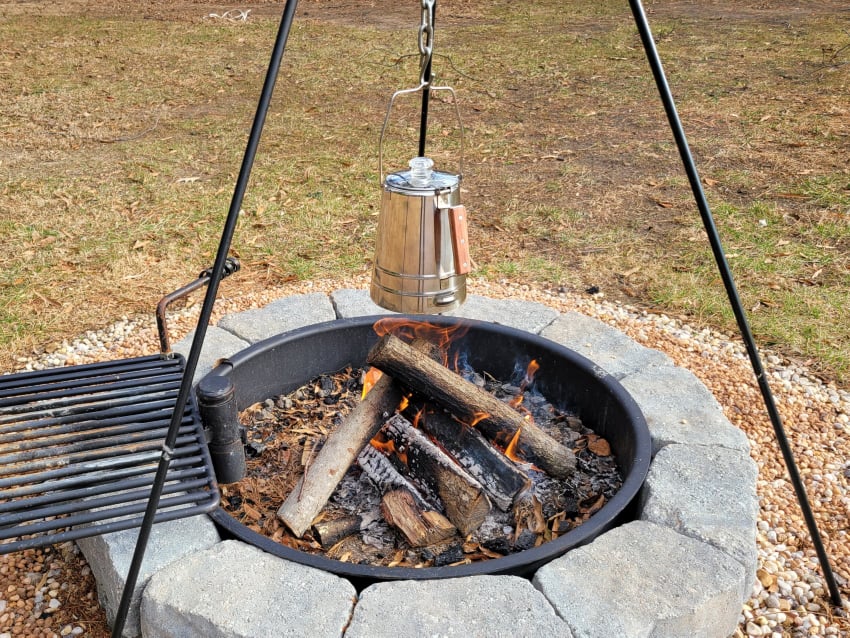
Tripods are also great for hanging coffee percolators, suspending grill racks over the fire, or holding lanterns around your campsite.
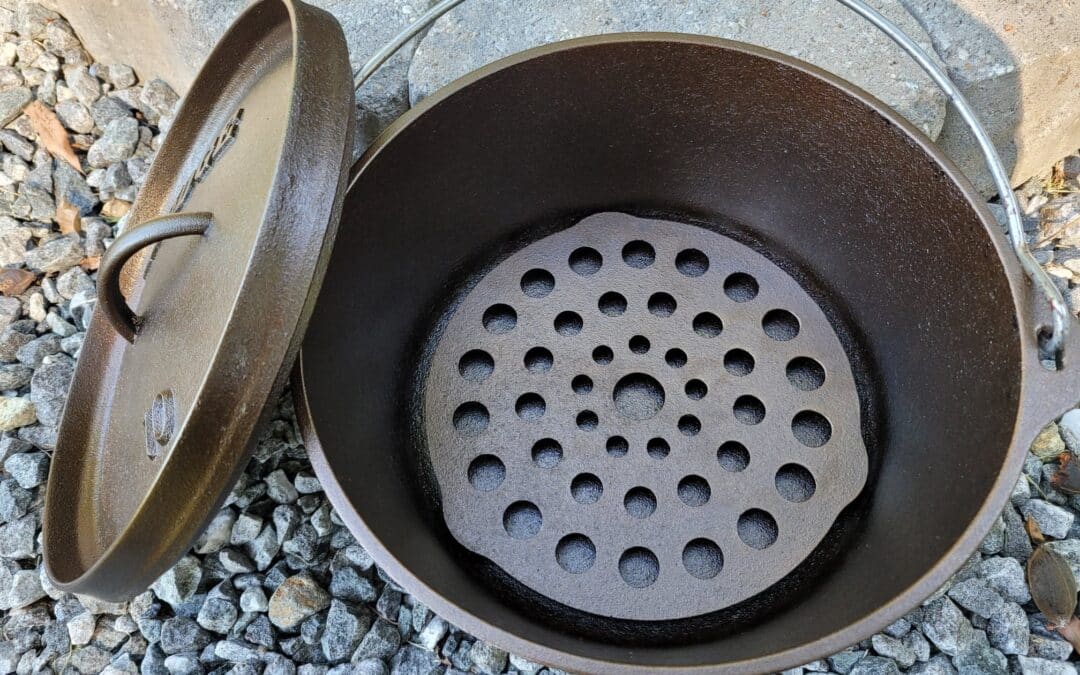
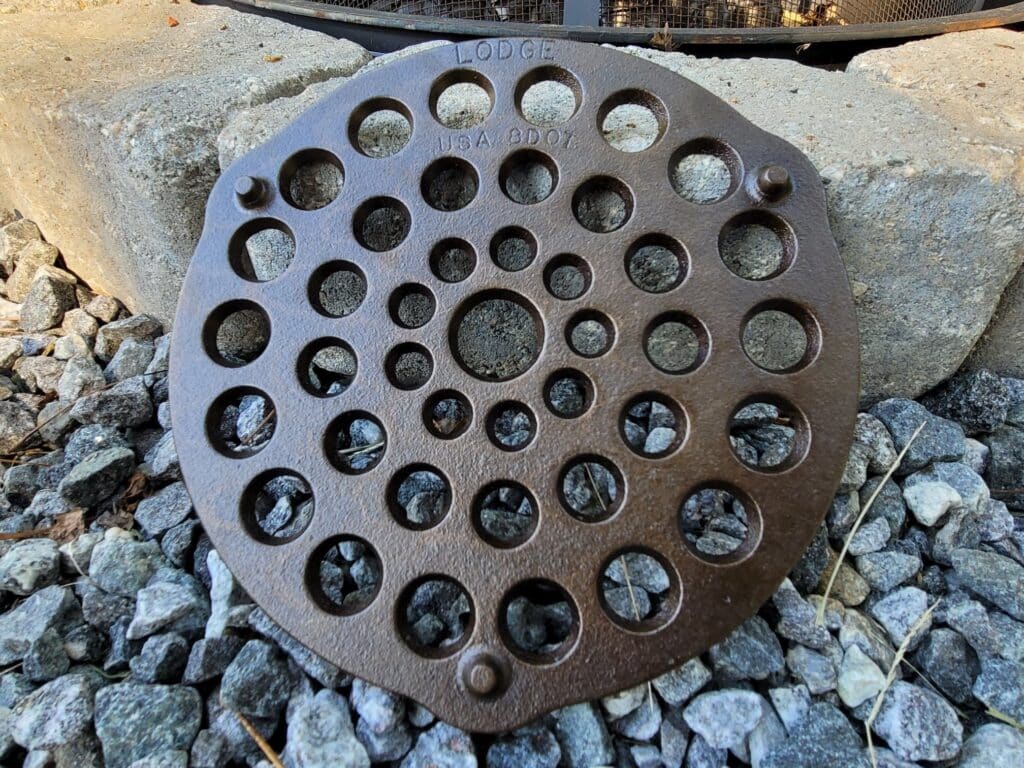
Dutch Oven Trivet

A dutch oven trivet is a cast iron rack placed in the bottom of a dutch oven. The trivet elevates food off the bottom of the pot to prevent scorching and burning. I typically use mine when cooking roasts, bread, or desserts.
A trivet can also be used as a meat rack in a dutch oven. Cooking fattier cuts of meat on the trivet allows grease to drain through the holes and away from your food.
The trivet model pictured is 8 inches in diameter and fits all 4-quart or larger dutch ovens.
Meat Thermometer

Since dutch oven temperature control is a little less precise than cooking in an indoor oven, it’s smart to use a meat thermometer to check the internal temperature of meats and seafood to ensure food safety. This digital model reads instantly, has a large screen, and the display lights up for easy reading in the shade or when cooking at night.
Timer

A timer might not be something you typically think of needing to include in your camp kitchen supply box, but it sure is useful. A digital timer is perfect for keeping an eye on cooking time and remembering when to rotate your dutch oven lid.
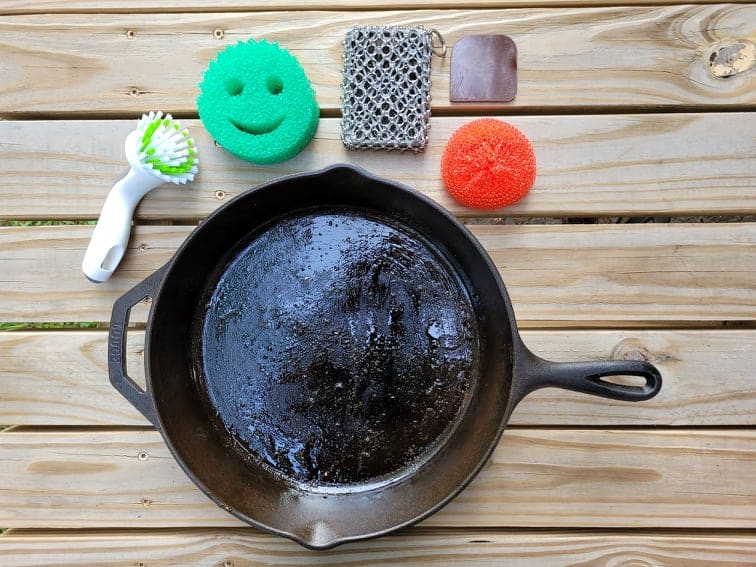
Dutch Oven Cleaning Tools


Cleaning your dutch oven after use is important to prevent it from rusting and avoid attracting bugs and wildlife to your campsite. These are my favorite cast iron cleaning tools:
- Castile Soap – This soap is plant-based, biodegradable, and won’t harm the seasoning on your cast iron. It’s versatile and perfect for washing hands, dishes, and clothes while camping.
- Plastic Dish Scrapers – These scrapers are such a huge help when trying to remove stuck-on food without damaging your cast iron’s seasoning layer.
- Scrub Daddy Sponges – Polymer sponges, like these, are super durable and remove food residue from cast iron without scratching it. They rinse clean and don’t retain odors.
Cast Iron Seasoning Items


Delicious dutch oven meals at camp begin with a strong cast iron seasoning layer! Before cooking, make sure your dutch oven is properly seasoned. Your cast iron’s seasoning layer acts as a protective barrier, helping to prevent food from sticking and avoiding rust from moisture.
As a professional cast iron restorer, these are my top picks to create a strong, functional seasoning layer:
- Grapeseed Oil – Grapeseed oil has an ideal fat profile and smoke point, making it my favorite oil for seasoning. This is the brand I use for nearly all of my restoration projects.
- BuzzyWaxx Products – BuzzyWaxx is a blend of seasoning oil and beeswax. It comes in either a wax disc or a metal tin, and it’s super easy to work with. The wax is very easy to apply and buff into the cast iron and yields fantastic, even seasoning results.
- Microfiber Cloths – When applying seasoning oil and buffing it off, it’s best to use a lint-free cloth. This helps avoid getting little paper towel fibers or fuzz particles caught on the rough surface of the cast iron.
Need help with cast iron seasoning? Check out my article, Seasoning Cast Iron Cookware: A Step-By-Step Guide for everything you need to know about seasoning oils, oven temperatures, and the seasoning process. Want the short version? Here’s my Cast Iron Seasoning Quick Guide, complete with a printable infographic.
Restoration Services
Do you have old or rusty cast iron cookware that needs to be restored, but you’re not sure how to do it yourself? We offer complete cast iron restoration services! Click here for information and to see amazing before and after photos!
This post may contain affiliate links. This means if you click on a link and make a purchase, I will receive a small commission, at no cost to you, that makes it possible for me to keep the Campfires and Cast Iron site up and running. Please see our disclosure policy for details.